Ingredients
Equipment
Method
Prepare the Crust
- Preheat your oven to 325°F and position the rack to the lower-middle position. Combine graham cracker crumbs, melted butter, sugar, and salt in a medium bowl, mixing until the texture resembles wet sand. Pro tip: The mixture should hold together when squeezed but remain crumbly—this creates a crust that's crispy, not dense.
- Press the mixture firmly into the bottom of your springform pan, using the bottom of a measuring cup to create an even, compact layer. You want about ¼ inch thickness. Pro tip: Don't press too hard or the crust will be tough. A light, even pressure works best.
- Bake the crust for 8-10 minutes until lightly golden and fragrant. Remove and let cool while preparing the filling. Pro tip: A pre-baked crust prevents sogginess and ensures a perfectly crispy base for your cheesecake filling.
Make the Cheesecake Filling
- Using an electric mixer on low speed, beat the room-temperature cream cheese for 2-3 minutes, stopping to scrape the bowl occasionally. The mixture should be completely smooth and creamy—no lumps. Pro tip: Room temperature cream cheese is absolutely critical. Cold cream cheese will result in a lumpy filling. Leave it out for at least 30 minutes.
- Gradually add the sugar while mixing on low speed, beating for about 2 minutes until light and fluffy. Scrape the bowl between additions. Pro tip: Don't overmix once sugar is added—you're not trying to create whipped cream, just incorporate the sugar evenly.
- Add sour cream, flour, and vanilla extract, mixing on low speed just until combined. Overmixing at this stage incorporates too much air, which causes cracks. Pro tip: Stop mixing the moment you don't see any streaks of sour cream. Patience here pays dividends.
- Add eggs one at a time, mixing on low speed after each addition and scraping the bowl. The batter should be smooth, creamy, and slightly thick. Pro tip: Add eggs at room temperature and beat minimally—you're just incorporating them, not aerating the filling.
Set Up the Water Bath and Bake
- Wrap the outside of your springform pan completely with aluminum foil, covering the bottom and sides. This prevents water from seeping into the cheesecake. Pro tip: Go up and over the edges, wrapping the foil around the sides and bottom at least twice. This extra step saves heartbreak.
- Pour the filling into the cooled crust, smoothing the top with an offset spatula. Place the wrapped springform pan inside a larger roasting pan. Pro tip: Fill slowly and let the batter settle naturally. You can tap the springform gently on the counter to release air bubbles.
- Pour hot water into the roasting pan until it reaches about halfway up the sides of the springform pan. This water bath ensures gentle, even cooking. Pro tip: Use boiling water—the heat helps set the cheesecake evenly from all sides, minimizing cracks.
- Bake for 55-70 minutes. The cheesecake is done when the edges are set but the center jiggles slightly when you gently shake the pan—about a 2-inch circle in the middle should wobble. Pro tip: Don't overbake! A slightly jiggly center will firm up as it cools. Overbaking is the #1 cause of cracks.
Cool Gradually
- Turn off the oven and crack the door open about 4 inches. Let the cheesecake sit in the warm oven for 30 minutes. This gradual cooling prevents the dreaded cracks from thermal shock. Pro tip: This step is non-negotiable if you want a crack-free cheesecake. The slow temperature change is crucial.
- Remove the cheesecake from the oven and let it cool to room temperature on the counter, about 1-2 hours. Then refrigerate for at least 6 hours, preferably overnight. Pro tip: Don't skip the room temperature cooling step. It allows the structure to set gently before the fridge does its work.
Make the Salted Caramel Sauce
- In a medium saucepan, melt the butter over medium heat. Add the brown sugar and stir constantly until the mixture reaches a full boil. Pro tip: Watch carefully and stir constantly. Caramel can burn quickly once it reaches temperature.
- Once boiling, let it bubble for 1-2 minutes without stirring. It should smell sweet and slightly nutty. Remove from heat and carefully pour in the cold cream, stirring gently. Pro tip: The mixture will bubble up when you add the cream—this is normal. Be careful of the steam and spatters.
- Stir in the fleur de sel to taste. Start with ½ teaspoon and add more if you prefer a saltier balance. Let cool for 10 minutes before using. Pro tip: The salt should be noticeable but not overpowering—it should enhance the caramel sweetness, not compete with it.
Assemble and Finish
- Once the cheesecake is fully chilled, run a thin knife around the edges, then remove the springform pan. Transfer to your serving platter or keep on the base. Pro tip: A warm, wet knife (dried between wipes) makes this step much easier and creates clean edges.
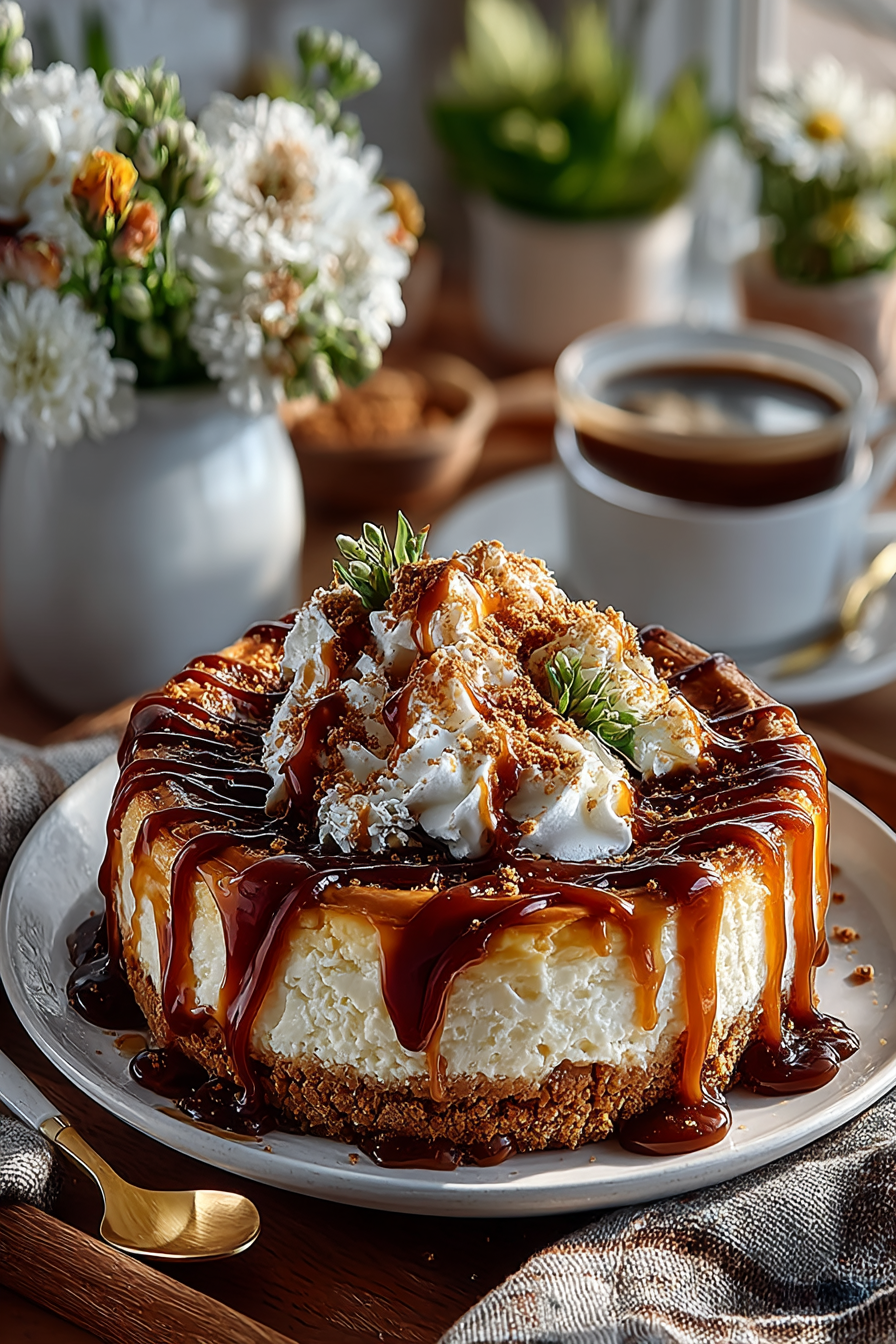
- Drizzle, swirl, or layer the salted caramel sauce over the top and sides of the cheesecake. You can be as generous or artistic as you'd like. Pro tip: If the caramel has cooled and thickened, gently reheat it over low heat for 30 seconds to restore its drizzling consistency.
Notes
- Room temperature ingredients are absolutely crucial—take cream cheese, eggs, and sour cream out 30-40 minutes before starting.
- The water bath is not optional for the best texture. Wrap your springform pan thoroughly in foil to prevent water seepage.
- The center should still jiggle slightly when you remove it from the oven. Overbaking is the #1 cause of dry, cracked cheesecake. Trust the wobble test.