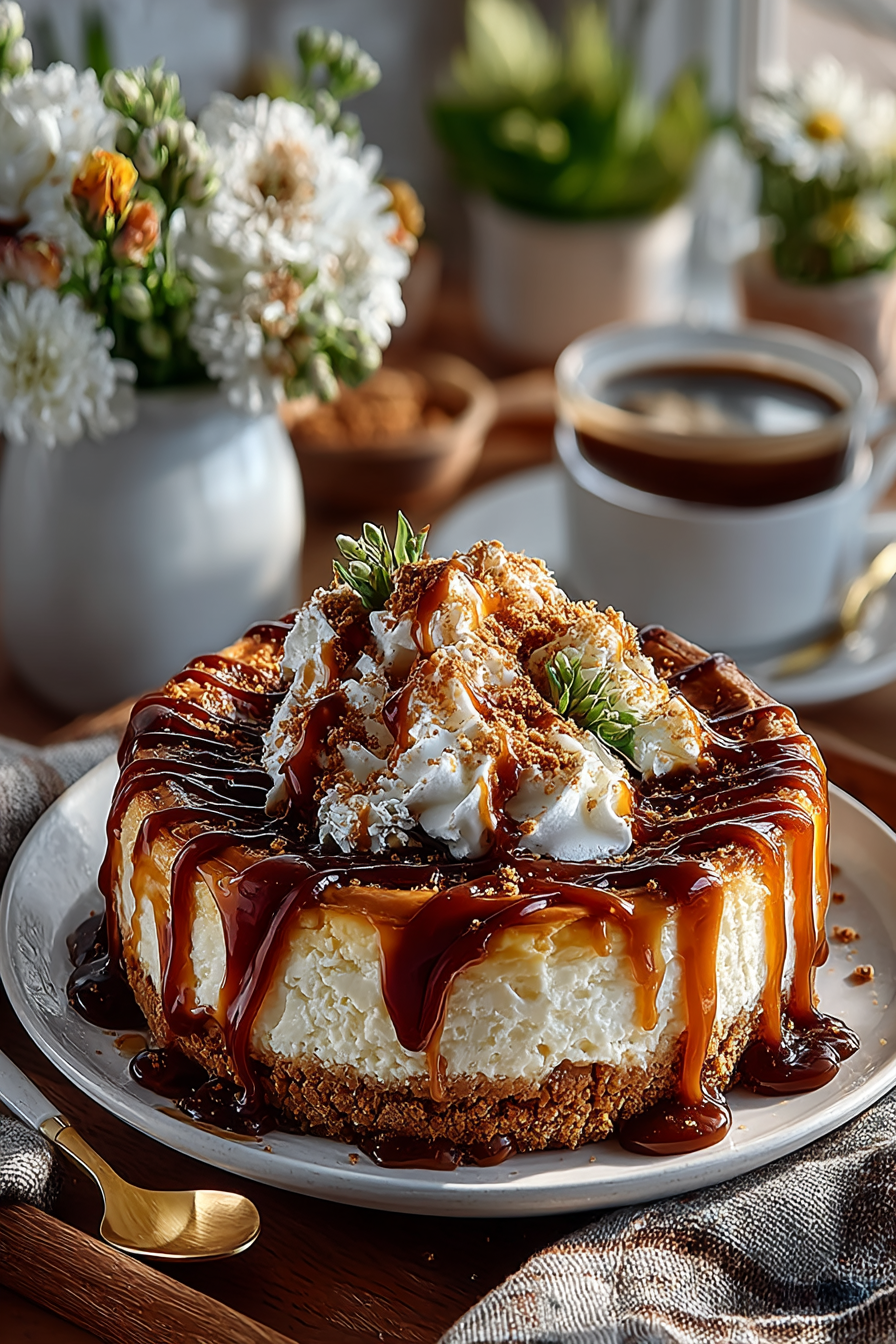
If you’ve ever wondered how to make a show-stopping salted caramel cheesecake recipe that tastes like it came straight from a fancy bakery, you’re in for a treat. This isn’t just any cheesecake—it’s a perfect balance of creamy, tangy, and irresistibly sweet with that sophisticated salty-sweet contrast that makes people close their eyes after the first bite. I’ve tested this recipe dozens of times, tweaking every element until it reached absolute perfection, and I’m thrilled to share it with you today.
What makes this salted caramel cheesecake recipe so special is that it doesn’t require any fancy equipment or bakery secrets. The buttery graham cracker crust provides the perfect textural foundation, while a silky smooth cream cheese filling gets crowned with homemade salted caramel sauce that you can drizzle, swirl, or generously layer throughout. Whether you’re celebrating a special occasion or simply craving an elegant dessert, this recipe delivers every single time.
Beyond just tasting incredible, this homemade cheesecake recipe is actually manageable for home bakers. Sure, it takes some time—but most of that is chilling time while you relax. I’ll walk you through every step, share my pro tips for avoiding cracks, and show you how to create that restaurant-quality salted caramel dessert that’ll have your guests asking for the recipe.
Why You’ll Love This Salted Caramel Cheesecake Recipe
- Decadently Creamy Texture: The perfect ratio of cream cheese, sour cream, and eggs creates a velvety, melt-in-your-mouth filling that’s neither too dense nor too light.
- Homemade Salted Caramel Sauce: Making your own salted caramel takes just 10 minutes and tastes infinitely better than store-bought versions—plus you control the saltiness level.
- Customizable Difficulty Level: Want an easy dessert recipes option? Skip the water bath for a simpler approach, or embrace the classic method for the silkiest results.
- Make-Ahead Friendly: This cheesecake actually improves after a day or two in the fridge, making it perfect for meal planning and stress-free entertaining.
- Impressive Presentation: With minimal effort, you can create a stunning centerpiece dessert that looks far more complicated than it actually is.
- Endless Customization: While this salted caramel cheesecake filling is magnificent on its own, you can easily add swirls of chocolate, caramel ribbons, or even no-bake variations.
Ingredients You’ll Need
The beauty of this salted caramel cheesecake recipe lies in its straightforward ingredient list. You’re likely already familiar with most of these pantry staples—graham crackers, butter, cream cheese, sugar, eggs, and vanilla. The magic happens when you combine them thoughtfully, building layers of flavor and texture that work in perfect harmony.
For the salted caramel sauce specifically, we’re using just four ingredients: butter, heavy cream, brown sugar, and fleur de sel. No corn syrup, no complicated techniques—just pure, honest caramel that you’ll be making again and again. I recommend splurging slightly on real vanilla extract and high-quality cream cheese, as these directly impact your final result in a very noticeable way.
For the Crust
- 2 cups graham cracker crumbs (about 14-16 full crackers, finely crushed)
- 6 tablespoons unsalted butter (melted)
- 2 tablespoons granulated sugar (optional but adds texture)
- 1/4 teaspoon sea salt (enhances graham cracker flavor)
For the Cheesecake Filling
- 32 oz cream cheese (8 oz packages, room temperature—this is crucial)
- 1 cup granulated sugar (use fine sugar for smoothness)
- 1/2 cup sour cream (adds tanginess and prevents cracking)
- 2 tablespoons all-purpose flour (stabilizes the filling)
- 1 teaspoon vanilla extract (pure vanilla, not imitation)
- 3 large eggs (room temperature)
For the Salted Caramel Sauce
- 1/2 cup unsalted butter (high quality)
- 1 cup packed brown sugar (light or dark, your preference)
- 1/2 cup heavy cream (cold or room temperature)
- 1 teaspoon fleur de sel or sea salt (adjust to taste preference)
Optional Add-ins:
- cocoa powder
- crushed pretzels or sea salt flakes
- dark chocolate shavings
How to Make Salted Caramel Cheesecake Recipe (Step-by-Step)
1. Prepare the Crust
Preheat your oven to 325°F and position the rack to the lower-middle position. Combine graham cracker crumbs, melted butter, sugar, and salt in a medium bowl, mixing until the texture resembles wet sand.
Pro tip: The mixture should hold together when squeezed but remain crumbly—this creates a crust that’s crispy, not dense.
Press the mixture firmly into the bottom of your springform pan, using the bottom of a measuring cup to create an even, compact layer. You want about ¼ inch thickness.
Pro tip: Don’t press too hard or the crust will be tough. A light, even pressure works best.
Bake the crust for 8-10 minutes until lightly golden and fragrant. Remove and let cool while preparing the filling.
Pro tip: A pre-baked crust prevents sogginess and ensures a perfectly crispy base for your cheesecake filling.
2. Make the Cheesecake Filling
Using an electric mixer on low speed, beat the room-temperature cream cheese for 2-3 minutes, stopping to scrape the bowl occasionally. The mixture should be completely smooth and creamy—no lumps.
Pro tip: Room temperature cream cheese is absolutely critical. Cold cream cheese will result in a lumpy filling. Leave it out for at least 30 minutes.
Gradually add the sugar while mixing on low speed, beating for about 2 minutes until light and fluffy. Scrape the bowl between additions.
Pro tip: Don’t overmix once sugar is added—you’re not trying to create whipped cream, just incorporate the sugar evenly.
Add sour cream, flour, and vanilla extract, mixing on low speed just until combined. Overmixing at this stage incorporates too much air, which causes cracks.
Pro tip: Stop mixing the moment you don’t see any streaks of sour cream. Patience here pays dividends.
Add eggs one at a time, mixing on low speed after each addition and scraping the bowl. The batter should be smooth, creamy, and slightly thick.
Pro tip: Add eggs at room temperature and beat minimally—you’re just incorporating them, not aerating the filling.
3. Set Up the Water Bath and Bake
Wrap the outside of your springform pan completely with aluminum foil, covering the bottom and sides. This prevents water from seeping into the cheesecake.
Pro tip: Go up and over the edges, wrapping the foil around the sides and bottom at least twice. This extra step saves heartbreak.
Pour the filling into the cooled crust, smoothing the top with an offset spatula. Place the wrapped springform pan inside a larger roasting pan.
Pro tip: Fill slowly and let the batter settle naturally. You can tap the springform gently on the counter to release air bubbles.
Pour hot water into the roasting pan until it reaches about halfway up the sides of the springform pan. This water bath ensures gentle, even cooking.
Pro tip: Use boiling water—the heat helps set the cheesecake evenly from all sides, minimizing cracks.
Bake for 55-70 minutes. The cheesecake is done when the edges are set but the center jiggles slightly when you gently shake the pan—about a 2-inch circle in the middle should wobble.
Pro tip: Don’t overbake! A slightly jiggly center will firm up as it cools. Overbaking is the #1 cause of cracks.
4. Cool Gradually
Turn off the oven and crack the door open about 4 inches. Let the cheesecake sit in the warm oven for 30 minutes. This gradual cooling prevents the dreaded cracks from thermal shock.
Pro tip: This step is non-negotiable if you want a crack-free cheesecake. The slow temperature change is crucial.
Remove the cheesecake from the oven and let it cool to room temperature on the counter, about 1-2 hours. Then refrigerate for at least 6 hours, preferably overnight.
Pro tip: Don’t skip the room temperature cooling step. It allows the structure to set gently before the fridge does its work.
5. Make the Salted Caramel Sauce
In a medium saucepan, melt the butter over medium heat. Add the brown sugar and stir constantly until the mixture reaches a full boil.
Pro tip: Watch carefully and stir constantly. Caramel can burn quickly once it reaches temperature.
Once boiling, let it bubble for 1-2 minutes without stirring. It should smell sweet and slightly nutty. Remove from heat and carefully pour in the cold cream, stirring gently.
Pro tip: The mixture will bubble up when you add the cream—this is normal. Be careful of the steam and spatters.
Stir in the fleur de sel to taste. Start with ½ teaspoon and add more if you prefer a saltier balance. Let cool for 10 minutes before using.
Pro tip: The salt should be noticeable but not overpowering—it should enhance the caramel sweetness, not compete with it.
6. Assemble and Finish
Once the cheesecake is fully chilled, run a thin knife around the edges, then remove the springform pan. Transfer to your serving platter or keep on the base.
Pro tip: A warm, wet knife (dried between wipes) makes this step much easier and creates clean edges.
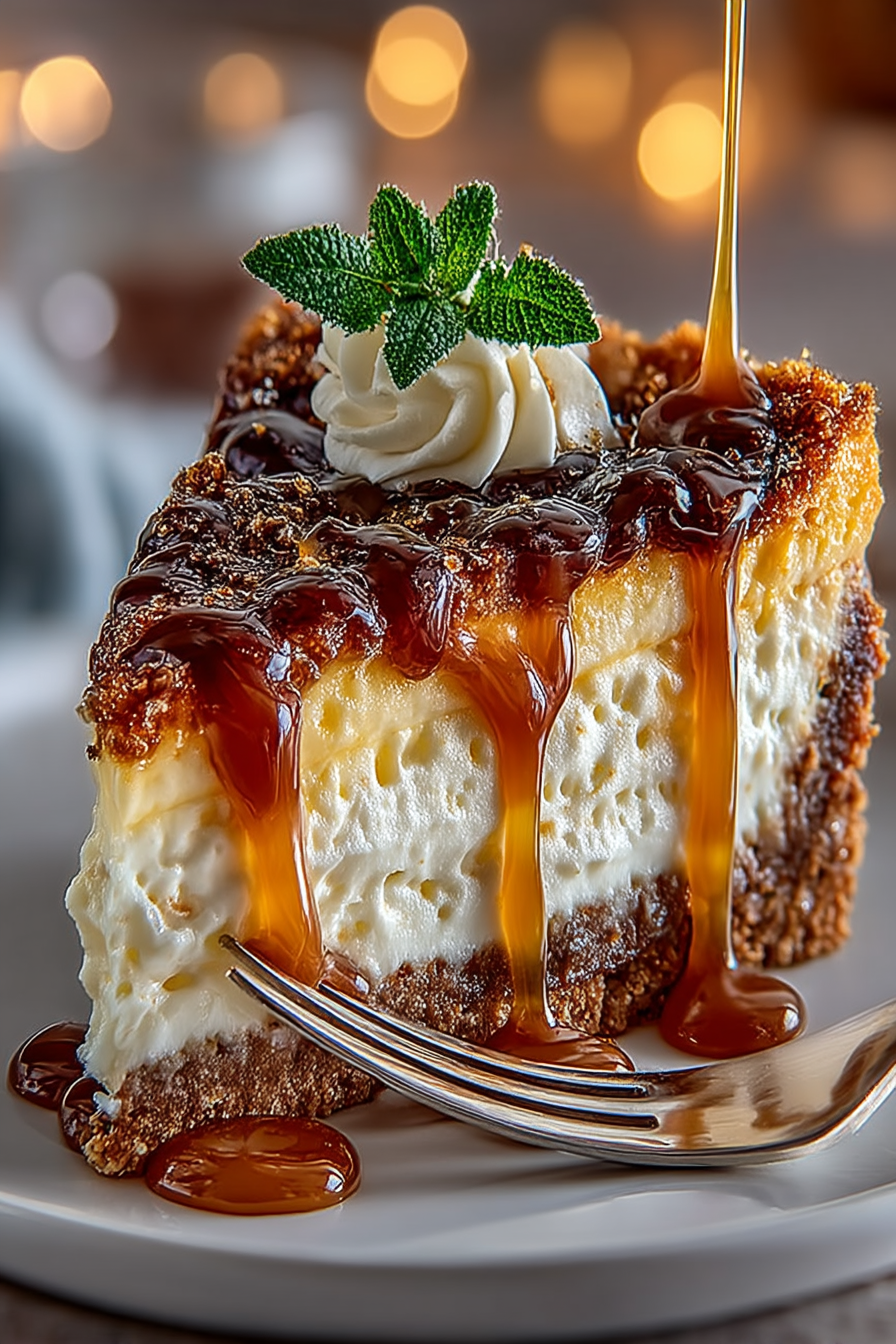
Drizzle, swirl, or layer the salted caramel sauce over the top and sides of the cheesecake. You can be as generous or artistic as you’d like.
Pro tip: If the caramel has cooled and thickened, gently reheat it over low heat for 30 seconds to restore its drizzling consistency.
Salted Caramel Cheesecake Recipe – Full Recipe
Salted Caramel Cheesecake Recipe
Ingredients
Equipment
Method
- Preheat your oven to 325°F and position the rack to the lower-middle position. Combine graham cracker crumbs, melted butter, sugar, and salt in a medium bowl, mixing until the texture resembles wet sand. Pro tip: The mixture should hold together when squeezed but remain crumbly—this creates a crust that's crispy, not dense.
- Press the mixture firmly into the bottom of your springform pan, using the bottom of a measuring cup to create an even, compact layer. You want about ¼ inch thickness. Pro tip: Don't press too hard or the crust will be tough. A light, even pressure works best.
- Bake the crust for 8-10 minutes until lightly golden and fragrant. Remove and let cool while preparing the filling. Pro tip: A pre-baked crust prevents sogginess and ensures a perfectly crispy base for your cheesecake filling.
- Using an electric mixer on low speed, beat the room-temperature cream cheese for 2-3 minutes, stopping to scrape the bowl occasionally. The mixture should be completely smooth and creamy—no lumps. Pro tip: Room temperature cream cheese is absolutely critical. Cold cream cheese will result in a lumpy filling. Leave it out for at least 30 minutes.
- Gradually add the sugar while mixing on low speed, beating for about 2 minutes until light and fluffy. Scrape the bowl between additions. Pro tip: Don't overmix once sugar is added—you're not trying to create whipped cream, just incorporate the sugar evenly.
- Add sour cream, flour, and vanilla extract, mixing on low speed just until combined. Overmixing at this stage incorporates too much air, which causes cracks. Pro tip: Stop mixing the moment you don't see any streaks of sour cream. Patience here pays dividends.
- Add eggs one at a time, mixing on low speed after each addition and scraping the bowl. The batter should be smooth, creamy, and slightly thick. Pro tip: Add eggs at room temperature and beat minimally—you're just incorporating them, not aerating the filling.
- Wrap the outside of your springform pan completely with aluminum foil, covering the bottom and sides. This prevents water from seeping into the cheesecake. Pro tip: Go up and over the edges, wrapping the foil around the sides and bottom at least twice. This extra step saves heartbreak.
- Pour the filling into the cooled crust, smoothing the top with an offset spatula. Place the wrapped springform pan inside a larger roasting pan. Pro tip: Fill slowly and let the batter settle naturally. You can tap the springform gently on the counter to release air bubbles.
- Pour hot water into the roasting pan until it reaches about halfway up the sides of the springform pan. This water bath ensures gentle, even cooking. Pro tip: Use boiling water—the heat helps set the cheesecake evenly from all sides, minimizing cracks.
- Bake for 55-70 minutes. The cheesecake is done when the edges are set but the center jiggles slightly when you gently shake the pan—about a 2-inch circle in the middle should wobble. Pro tip: Don't overbake! A slightly jiggly center will firm up as it cools. Overbaking is the #1 cause of cracks.
- Turn off the oven and crack the door open about 4 inches. Let the cheesecake sit in the warm oven for 30 minutes. This gradual cooling prevents the dreaded cracks from thermal shock. Pro tip: This step is non-negotiable if you want a crack-free cheesecake. The slow temperature change is crucial.
- Remove the cheesecake from the oven and let it cool to room temperature on the counter, about 1-2 hours. Then refrigerate for at least 6 hours, preferably overnight. Pro tip: Don't skip the room temperature cooling step. It allows the structure to set gently before the fridge does its work.
- In a medium saucepan, melt the butter over medium heat. Add the brown sugar and stir constantly until the mixture reaches a full boil. Pro tip: Watch carefully and stir constantly. Caramel can burn quickly once it reaches temperature.
- Once boiling, let it bubble for 1-2 minutes without stirring. It should smell sweet and slightly nutty. Remove from heat and carefully pour in the cold cream, stirring gently. Pro tip: The mixture will bubble up when you add the cream—this is normal. Be careful of the steam and spatters.
- Stir in the fleur de sel to taste. Start with ½ teaspoon and add more if you prefer a saltier balance. Let cool for 10 minutes before using. Pro tip: The salt should be noticeable but not overpowering—it should enhance the caramel sweetness, not compete with it.
- Once the cheesecake is fully chilled, run a thin knife around the edges, then remove the springform pan. Transfer to your serving platter or keep on the base. Pro tip: A warm, wet knife (dried between wipes) makes this step much easier and creates clean edges.
- Drizzle, swirl, or layer the salted caramel sauce over the top and sides of the cheesecake. You can be as generous or artistic as you'd like. Pro tip: If the caramel has cooled and thickened, gently reheat it over low heat for 30 seconds to restore its drizzling consistency.
Notes
- Room temperature ingredients are absolutely crucial—take cream cheese, eggs, and sour cream out 30-40 minutes before starting.
- The water bath is not optional for the best texture. Wrap your springform pan thoroughly in foil to prevent water seepage.
- The center should still jiggle slightly when you remove it from the oven. Overbaking is the #1 cause of dry, cracked cheesecake. Trust the wobble test.
Tips for the Best Salted Caramel Cheesecake Recipe
- Room Temperature Ingredients Matter: Remove cream cheese, sour cream, and eggs from the refrigerator at least 30 minutes before mixing. Room temperature ingredients combine smoothly without lumps, which directly impacts your cheesecake’s creamy texture.
- Don’t Skip the Water Bath: The water bath is your secret weapon against cracks. It creates a gentle, humid baking environment that allows the cheesecake to set evenly without the top drying out faster than the interior.
- Invest in a Good Thermometer: If you’re serious about caramel, use a candy thermometer. The perfect salted caramel sauce reaches about 240°F (soft ball stage), and guessing can lead to under-cooked or burnt results.
- Make Salted Caramel Ahead: The sauce keeps refrigerated for up to two weeks. You can make it days in advance and simply reheat gently before serving. This is a massive time-saver for entertaining.
- Chill Longer for Better Texture: While technically done after 6 hours, cheesecake is absolutely superior after chilling overnight or even 2-3 days. The flavors meld and the texture becomes even creamier.
- Use a Springform Pan:** This is not the time to improvise. A springform pan ensures clean removal and prevents damage to your beautiful creation.
Variations to Try
- No-Bake Salted Caramel Cheesecake: Skip the oven entirely and use a more forgiving approach—whip cold cream cheese with powdered sugar, fold in whipped cream and a touch of sour cream, then layer into your crust. Chill for at least 8 hours. Easier dessert recipes don’t get more elegant than this.
- Dark Chocolate Swirl Version: Melt 6 ounces of dark chocolate and swirl it into the filling before baking, then top with both chocolate ganache and salted caramel sauce for a double-duty decadence.
- Mini Salted Caramel Cheesecake Cups: Divide the crust and filling between a muffin tin lined with cupcake liners. Bake for 20-25 minutes and top individually with caramel. Perfect for portion-controlled entertaining.
- Pretzel Crust Variation: Replace ½ cup of graham crackers with crushed pretzels in your cheesecake crust recipe for a sweet-and-salty base that perfectly complements the caramel.
- Espresso-Caramel Hybrid: Add 1½ teaspoons of instant espresso powder to your filling for a sophisticated coffee note that pairs beautifully with the salted caramel dessert.
Storage and Meal Prep Tips
- Refrigerator Storage: Covered tightly with plastic wrap or in an airtight container, your salted caramel cheesecake recipe keeps for 4-5 days in the fridge. The flavors actually improve after a day or two as everything melds together.
- Freezer Storage: Wrapped well in plastic wrap and then aluminum foil, the cheesecake freezes beautifully for up to 3 months. Thaw in the refrigerator overnight before serving. Add fresh salted caramel sauce after thawing for the best presentation.
- Serving Cold: This cheesecake is best served straight from the refrigerator—cold and creamy. You can let slices sit at room temperature for 5-10 minutes if you prefer a slightly softer texture.
- Reheating the Sauce: If your salted caramel sauce solidifies in the fridge, gently reheat it in a double boiler or microwave in 10-second increments, stirring between bursts, until it reaches drizzling consistency again.
Nutritional Benefits
While this salted caramel cheesecake recipe is admittedly an indulgent treat, it does contain some redeeming qualities. The cream cheese provides calcium and protein, the eggs contribute choline and lutein for eye health, and the caramel sauce offers quick energy from its sugars. Of course, moderation is key with such a rich dessert—this is meant to be savored in smaller portions rather than consumed in large quantities.
- Calcium from cream cheese supports bone and teeth health
- Protein from eggs aids satiety and muscle maintenance
- Butter provides fat-soluble vitamins A and D
- Brown sugar in the caramel offers a touch of molasses nutrients
What to Serve With Salted Caramel Cheesecake Recipe
- Espresso or Strong Coffee: The bitterness of a good espresso or Americano cuts through the richness beautifully, making each bite feel lighter and less sweet.
- Dessert Wine or Port: A ruby port or late-harvest riesling complements the sweet, salty, and creamy elements perfectly for sophisticated entertaining.
- Vanilla Ice Cream: A small scoop of high-quality vanilla ice cream adds cooling contrast and extra creaminess. Vanilla is subtle enough not to compete with the caramel.
- Sparkling Apple Cider: The acidity and slight tannin of a dry sparkling cider provides refreshing contrast without overpowering the cheesecake’s delicate flavors.
- Herbal Tea: Chamomile or mint tea offers a gentle, aromatic pairing that cleanses the palate between bites without clashing with the salted caramel notes.
Frequently Asked Questions
Why does my cheesecake have cracks on top?
Cracks typically form from overbaking, thermal shock (too-fast cooling), or overmixing air into the filling. The best prevention is: 1) Don’t overbake—the center should still jiggle slightly; 2) Use a water bath for gentle, even cooking; 3) Cool gradually by cracking the oven door and letting the cheesecake sit at room temperature before refrigerating; 4) Minimize mixing once eggs are added. If your cheesecake does crack, don’t worry—the salted caramel sauce and toppings will hide imperfections beautifully.
Can I make a no-bake salted caramel cheesecake instead?
Absolutely! A no-bake cheesecake recipe is actually easier and still delicious. Whip 16 oz cold cream cheese with ¾ cup powdered sugar until fluffy. Fold in 1 cup heavy cream (whipped to stiff peaks) and ¼ cup sour cream gently. Press your crust into the pan, add the filling, and chill for at least 8 hours. Top with salted caramel sauce when ready to serve. This method eliminates concerns about baking time and cracking, making it perfect for beginners.
How do I store my salted caramel cheesecake, and how long does it last?
Store your cheesecake covered in the refrigerator for 4-5 days. It freezes excellently for up to 3 months—wrap it well in plastic wrap and foil. Thaw overnight in the fridge before serving. The salted caramel sauce keeps refrigerated for 2 weeks. You can prepare this ahead of time for parties, which makes entertaining stress-free. Many people find the cheesecake actually tastes better on day two or three as flavors meld together.
What’s the difference between salted caramel and regular caramel?
Regular caramel is pure sugar and butter—sweet without complexity. Salted caramel adds a strategic amount of salt (usually fleur de sel or sea salt) that enhances the caramel’s depth, cuts through the sweetness, and creates a more sophisticated flavor. The salt doesn’t make it salty; instead, it amplifies the caramel’s natural sweet, buttery notes. For this salted caramel cheesecake recipe, start with ½ teaspoon of salt and adjust to your taste preference.
Can I make this cheesecake without a water bath?
While possible, the water bath is highly recommended for the best results. Without it, your cheesecake is more prone to cracking, browning unevenly, and developing a dry top. If you must skip it, lower your oven temperature to 300°F and bake for 70-85 minutes, checking frequently. The center should barely jiggle. Even with adjustments, you’ll likely get better results with the water bath method. Think of it as a small effort for significantly better outcomes—and the best cheesecake recipe deserves the proper technique.
Final Thoughts
Making a homemade cheesecake recipe from scratch might seem daunting at first, but I promise you—if you follow these steps carefully and give the process time to work, you’ll create something absolutely spectacular. This salted caramel cheesecake recipe is the kind of dessert that makes people stop mid-conversation to ask about it, the kind that transforms an ordinary dinner into a special occasion. More importantly, it proves that restaurant-quality desserts aren’t reserved for professionals.
The beauty of this recipe is that it’s infinitely adaptable. Once you’ve mastered the basic technique, you can swap caramel sauce for chocolate ganache, add espresso powder, or go the no-bake route entirely. But honestly? The classic salted caramel dessert version is so good, you might never need anything else. I encourage you to make it soon, share it with people you love, and experience the joy of watching their faces light up after that first taste.
Ready to Try It?
Don’t let this amazing salted caramel cheesecake recipe sit in your bookmarks—it’s time to make it! Pick a weekend soon, gather your ingredients, and commit to creating something beautiful. I absolutely guarantee it will be worth every minute. Come back and let me know how it turned out; I read and respond to every comment. You’ve got this, and your kitchen is about to smell incredible.