Ingredients
Equipment
Method
Prepare Your Workspace
- Line all baking sheets with parchment paper and preheat ovens to specified temperatures for each recipe. Bring all dairy ingredients to room temperature, which typically takes 30-60 minutes. Pro tip: Room temperature ingredients blend more easily and create better texture in your finished desserts.
- Set up separate mixing stations for different colored batters if making multiple treats. Organize your food coloring, extracts, and decorating supplies within easy reach. Pro tip: Having everything organized beforehand prevents accidentally adding wrong ingredients when working with multiple colored batters.
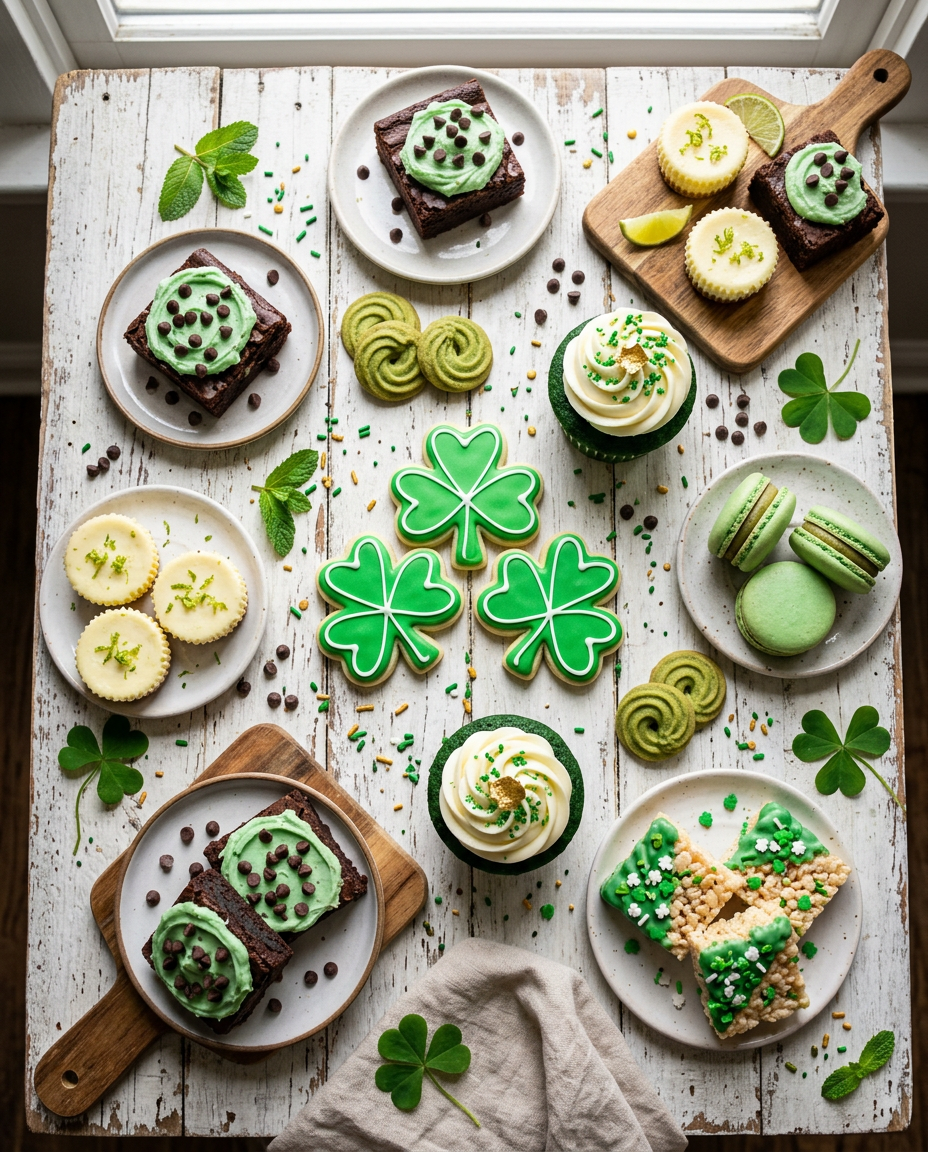
Master the Green Coloring Technique
- Start with gel food coloring rather than liquid, using just a few drops at first. Mix thoroughly and gradually add more until you achieve your desired shade of green. Pro tip: Colors often deepen as they sit, so start lighter than your target shade.
- For natural green alternatives, try matcha powder for a subtle green, or spinach powder for vibrant color without strong flavor. Pro tip: When using natural colorings, sift them first to prevent clumps in your batter.
Basic Cookie Preparation
- Cream butter and sugar until light and fluffy, about 3-4 minutes. Add eggs one at a time, then vanilla and any extracts you're using. Pro tip: Don't skip the creaming step – it creates the perfect cookie texture.
- Gradually mix in dry ingredients until just combined. Divide dough if making multiple colors, then add food coloring to each portion. Pro tip: Overmixing after adding flour can make cookies tough, so mix just until ingredients are combined.
Cake and Cupcake Basics
- For green velvet cakes, follow red velvet technique but substitute green coloring. The slight tanginess from buttermilk and vinegar is key to the classic flavor. Pro tip: Add food coloring after creaming wet ingredients but before adding dry ingredients for even distribution.
- Fill cupcake liners only 2/3 full to prevent overflow, and rotate pans halfway through baking for even results. Pro tip: Use an ice cream scoop for perfectly portioned cupcakes every time.
Frosting and Decoration Techniques
- Beat cream cheese until smooth before adding any other ingredients. Gradually add powdered sugar to prevent lumps, then add coloring. Pro tip: Cold cream cheese will create lumpy frosting, so ensure it's properly softened.
- Use different piping tips to create shamrock shapes, grass effects, or smooth finishes. Practice on parchment paper first if trying new techniques. Pro tip: Chill decorated items for 15 minutes to set frosting before serving or stacking.
Assembly and Final Touches
- Allow all baked items to cool completely before frosting or decorating. This prevents melting and sliding decorations. Pro tip: Place cooled items in the refrigerator for 10 minutes before frosting for extra stability.
- Add final decorative touches like sprinkles, chocolate chips for 'dirt,' or coconut flakes while frosting is still soft so they adhere properly. Pro tip: Gently press decorations into soft frosting rather than just sprinkling on top for better adhesion.
Notes
- Gel food coloring works better than liquid for vibrant colors without affecting texture
- Most components can be made 2-3 days ahead and stored covered in refrigerator
- Natural green alternatives include matcha powder, spinach powder, or lime zest for those avoiding artificial coloring