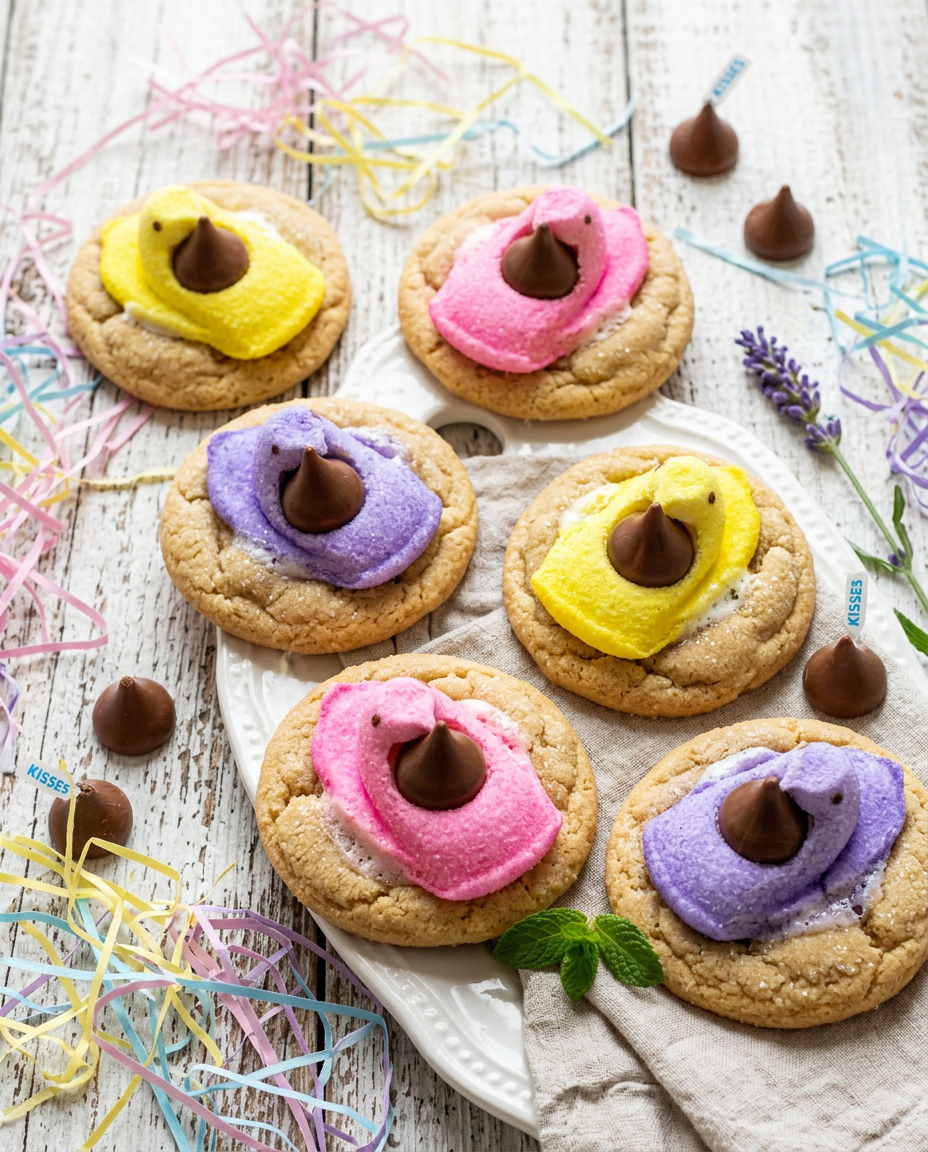
These delightful Peeps Kiss Cookies combine the beloved flavors of Easter with classic cookie comfort in one irresistible treat! Picture soft, chewy sugar cookies topped with colorful Peeps marshmallows and finished with a chocolate kiss – it’s like Easter morning captured in cookie form. As someone who’s been baking holiday treats for over a decade, I can tell you that these cookies never fail to bring smiles to faces both young and old.
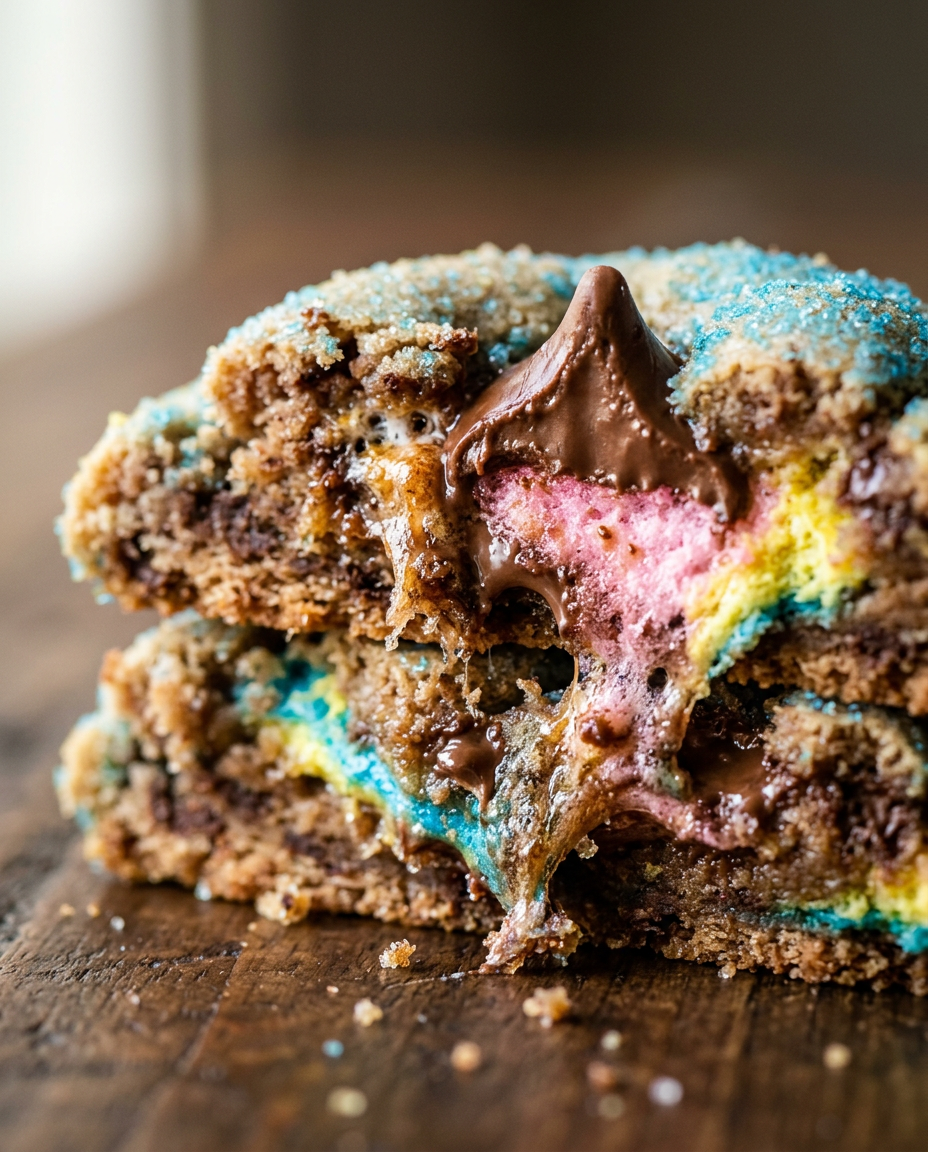
What makes this recipe truly special is how it transforms simple pantry staples into something magical. The combination of vanilla cookie base, fluffy marshmallow Peeps, and rich chocolate creates layers of texture and flavor that make every bite exciting. Plus, they’re so visually stunning that they’ll be the star of any Easter gathering or spring celebration!
Why You’ll Love This Peeps Kiss Cookies Recipe
- Kid-Friendly Fun: Children love helping press the Peeps and chocolate kisses into the warm cookies, making this a perfect family baking project.
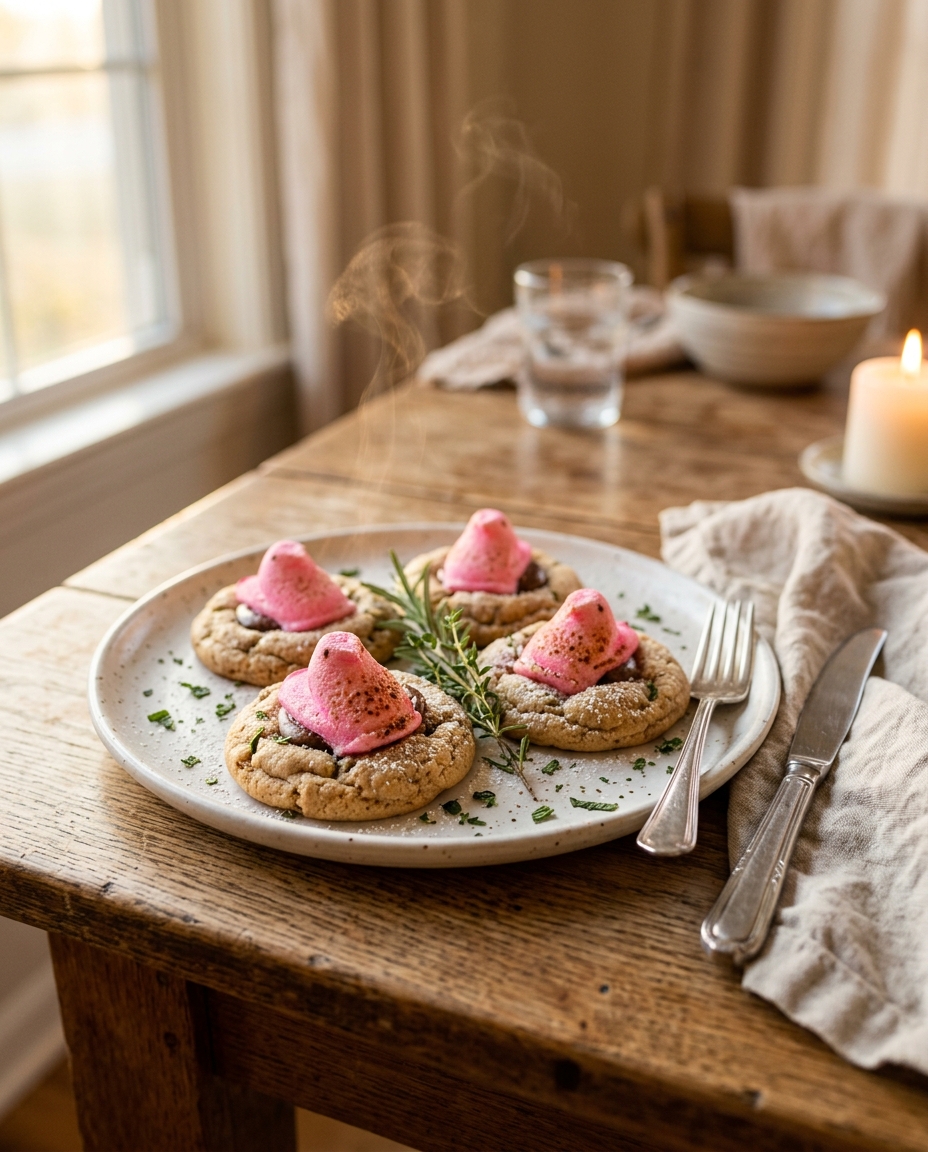
- Visually Stunning: The bright colors of Peeps candy create Instagram-worthy cookies that look as good as they taste.
- Simple Ingredients: Uses common baking staples you likely already have, plus festive Peeps and chocolate kisses.
- Quick Assembly: Takes just minutes to assemble once the cookie base is baked, making them perfect for last-minute entertaining.
- Customizable Colors: Mix and match different colored Peeps to match your party theme or personal preferences.
- Make-Ahead Friendly: Cookie dough can be prepared in advance, and assembled cookies stay fresh for days.
Ingredients You’ll Need
The beauty of this Easter cookies recipe lies in its simplicity. You’ll need basic cookie ingredients to create a tender, vanilla-scented base that serves as the perfect foundation for our festive toppings. The real stars, of course, are the colorful Peeps marshmallow candies and chocolate kisses that transform ordinary cookies into Easter magic.
When shopping for Peeps, look for the freshest ones available – they should feel soft and squishy, not hard or stale. I prefer using the classic chick or bunny shapes, but any Peeps variety will work beautifully in this recipe.
For the Cookie Base
- 2¼ cups all-purpose flour
- 1 teaspoon baking soda
- 1 teaspoon salt
- 1 cup butter (softened)
- ¾ cup granulated sugar
- ¾ cup brown sugar (packed)
- 2 large eggs
- 2 teaspoons vanilla extract
For the Toppings
- 24 pieces Peeps marshmallow candies (any color)
- 24 pieces chocolate kisses (unwrapped)
Optional Add-ins:
- colored sugar
- mini chocolate chips
How to Make Peeps Kiss Cookies Recipe (Step-by-Step)
1. Prepare the Dough
Preheat your oven to 375°F (190°C). Line baking sheets with parchment paper or silicone baking mats.
In a medium bowl, whisk together flour, baking soda, and salt. Set aside.
In a large mixing bowl, cream together softened butter, granulated sugar, and brown sugar until light and fluffy, about 3-4 minutes with an electric mixer.
Pro tip: Make sure butter is properly softened – it should give slightly when pressed but not be melty.
2. Finish the Cookie Dough
Beat in eggs one at a time, mixing well after each addition. Add vanilla extract and mix until combined.
Gradually add the flour mixture to the butter mixture, mixing on low speed until just combined. Don’t overmix.
Pro tip: Stop mixing as soon as you don’t see streaks of flour – overmixing leads to tough cookies.
3. Shape and Bake Cookies
Using a cookie scoop or spoon, drop rounded tablespoons of dough onto prepared baking sheets, spacing them about 2 inches apart.
Bake for 8-10 minutes, or until edges are lightly golden but centers still look slightly underbaked.
Pro tip: Cookies will continue cooking on the hot pan after removal, so don’t overbake.
4. Add the Peeps
Remove cookies from oven and immediately press one Peeps candy into the center of each warm cookie.
Pro tip: Work quickly while cookies are warm – this helps the Peeps adhere better.
Return cookies to oven for 1-2 minutes, just until Peeps begin to puff and soften slightly.
Pro tip: Watch carefully – Peeps can expand quickly in the oven.
5. Finish with Chocolate
Remove from oven and immediately press one chocolate kiss into the center of each Peeps, creating a layered effect.
Allow cookies to cool on baking sheets for 5 minutes before transferring to wire racks.
Pro tip: This cooling time helps set the toppings properly.
Peeps Kiss Cookies Recipe – Full Recipe
Peeps Kiss Cookies Recipe
Ingredients
Equipment
Method
- Preheat your oven to 375°F (190°C). Line baking sheets with parchment paper or silicone baking mats.
- In a medium bowl, whisk together flour, baking soda, and salt. Set aside.
- In a large mixing bowl, cream together softened butter, granulated sugar, and brown sugar until light and fluffy, about 3-4 minutes with an electric mixer. Pro tip: Make sure butter is properly softened - it should give slightly when pressed but not be melty.
- Beat in eggs one at a time, mixing well after each addition. Add vanilla extract and mix until combined.
- Gradually add the flour mixture to the butter mixture, mixing on low speed until just combined. Don't overmix. Pro tip: Stop mixing as soon as you don't see streaks of flour - overmixing leads to tough cookies.
- Using a cookie scoop or spoon, drop rounded tablespoons of dough onto prepared baking sheets, spacing them about 2 inches apart.
- Bake for 8-10 minutes, or until edges are lightly golden but centers still look slightly underbaked. Pro tip: Cookies will continue cooking on the hot pan after removal, so don't overbake.
- Remove cookies from oven and immediately press one Peeps candy into the center of each warm cookie. Pro tip: Work quickly while cookies are warm - this helps the Peeps adhere better.
- Return cookies to oven for 1-2 minutes, just until Peeps begin to puff and soften slightly. Pro tip: Watch carefully - Peeps can expand quickly in the oven.
- Remove from oven and immediately press one chocolate kiss into the center of each Peeps, creating a layered effect.
- Allow cookies to cool on baking sheets for 5 minutes before transferring to wire racks. Pro tip: This cooling time helps set the toppings properly.
Notes
- Work quickly when adding Peeps and chocolate kisses to warm cookies for best adhesion
- Use fresh, soft Peeps for optimal results - stale ones won't meld properly with cookies
- Cookies will look slightly underbaked when first removed from oven but will finish cooking on hot pan
Tips for the Best Peeps Kiss Cookies Recipe
- Temperature Matters: Make sure your oven temperature is accurate – too hot and the Peeps will melt completely, too cool and they won’t soften properly.
- Fresh Peeps Work Best: Use fresh, soft Peeps for the best results. Stale ones won’t meld as nicely with the cookies.
- Don’t Overbake: The cookies should look slightly underbaked when you first remove them – they’ll finish cooking on the hot pan.
- Work Quickly: Have your Peeps and chocolate kisses ready to go before you start baking, as timing is crucial for proper assembly.
- Cool Completely: Allow cookies to cool completely before storing to prevent the chocolate from smudging.
- Room Temperature Ingredients: Ensure eggs and butter are at room temperature for the best cookie texture and easier mixing.
Variations to Try
- Chocolate Cookie Base: Replace ½ cup flour with unsweetened cocoa powder for chocolate Peeps kiss cookies.
- Funfetti Style: Add 2 tablespoons of colorful sprinkles to the cookie dough for extra festive flair.
- Peanut Butter Twist: Replace ½ cup butter with creamy peanut butter for a nutty flavor combination.
- Mini Version: Use mini Peeps and mini chocolate chips to create bite-sized versions perfect for parties.
- White Chocolate Finish: Substitute white chocolate kisses for milk chocolate to complement pastel Peeps colors.
Storage and Meal Prep Tips
- Room Temperature: Store in an airtight container at room temperature for up to 5 days – layer between parchment paper to prevent sticking.
- Refrigerator Storage: These cookies can be refrigerated for up to 1 week, though the texture is best at room temperature.
- Freezer Storage: Freeze assembled cookies for up to 2 months in freezer-safe containers, thaw at room temperature for 30 minutes before serving.
- Dough Make-Ahead: Cookie dough can be made 2 days ahead and refrigerated, or shaped into balls and frozen for up to 3 months.
Nutritional Benefits
While these colorful cookie treats are certainly an indulgence, they do provide some nutritional value from the basic cookie ingredients. The eggs contribute protein and essential amino acids, while the flour provides carbohydrates for energy.
- Eggs provide complete protein and vitamin B12
- Butter contributes vitamin A and energy-dense calories
- Flour offers B vitamins and iron fortification
- Moderate portion sizes make these suitable for special occasion enjoyment
What to Serve With Peeps Kiss Cookies Recipe
- Cold Milk: The classic cookie pairing that balances the sweetness perfectly
- Easter Punch: A fruity, colorful punch that complements the festive theme
- Vanilla Ice Cream: Serve alongside scoops of vanilla ice cream for an extra special dessert
- Hot Chocolate: Perfect for spring evenings when there’s still a chill in the air
- Fresh Berries: Add some strawberries or raspberries to balance the sweetness with fresh fruit
Frequently Asked Questions
Can I make Peeps Kiss Cookies ahead of time?
Yes! You can prepare the cookie dough up to 2 days in advance and store it in the refrigerator. The fully assembled cookies can be made up to 3 days ahead and stored in an airtight container at room temperature. For best results, assemble the cookies the day you plan to serve them.
What happens if my Peeps melt completely in the oven?
If your oven runs hot or you bake them too long, Peeps can melt completely. This usually happens when the temperature is above 375°F or they’re in the oven for more than 2 minutes in the second baking. The cookies will still taste great, just with a different appearance!
Can I use stale Peeps for this recipe?
Fresh Peeps work much better than stale ones. Stale Peeps won’t soften and meld with the cookie as nicely, and they may not hold their shape as well. If your Peeps are slightly stale, you can try placing them in a container with a slice of bread overnight to soften them up.
How do I prevent the chocolate kisses from melting?
The key is timing – add the chocolate kisses immediately after the second bake when the cookies are hot but not scorching. The residual heat will slightly soften the chocolate base to help it adhere without completely melting. Let the cookies cool completely before moving them.
Can I freeze Peeps Kiss Cookies?
Yes, these cookies freeze well for up to 2 months. Place them in a single layer in freezer-safe containers with parchment paper between layers. Thaw at room temperature for about 30 minutes before serving. The texture remains good, though the Peeps may lose a bit of their vibrant color.
Final Thoughts
These Peeps Kiss Cookies truly capture the joy and whimsy of Easter in every bite. There’s something magical about watching children’s faces light up when they see these colorful creations, and honestly, adults get just as excited! The combination of textures – from the soft cookie base to the chewy marshmallow Peeps and smooth chocolate kiss – creates a delightful eating experience that’s hard to resist.
Whether you’re planning an Easter party, looking for a fun baking project with kids, or simply want to add some spring color to your dessert table, this recipe delivers on all fronts. The best part is how adaptable it is – you can customize colors, try different flavors, or even make mini versions for different occasions.
Ready to Try It?
Ready to bring some Easter magic to your kitchen? Gather your ingredients, unwrap those chocolate kisses, and let’s create some colorful cookie memories together! Don’t forget to share photos of your beautiful Peeps Kiss Cookies on social media – I love seeing how creative everyone gets with their color combinations. Happy baking, and may your Easter be filled with sweet treats and even sweeter moments!