Ingredients
Equipment
Method
Prep the Pork Cutlets
- If your pork chops are thicker than 1/4 inch, place them between two pieces of plastic wrap and pound gently but firmly with a meat mallet until they reach uniform 1/4-inch thickness. This ensures even cooking throughout. Pro tip: Pro tip: Pound from the center outward in gentle strokes rather than aggressive whacking—this creates an even thickness without tearing the meat fibers.
- Pat the pork cutlets dry with paper towels. Moisture is the enemy of a crispy crust, so don't skip this step even though it seems minor. Pro tip: Consider patting the meat 15-20 minutes ahead of time—this allows surface moisture to evaporate naturally, creating an even drier exterior for breading.
- Season both sides of each cutlet generously with salt, pepper, and garlic powder. Let rest for 5 minutes to allow seasoning to penetrate the meat. Pro tip: Season just before breading rather than hours ahead, as salt can draw out moisture if left too long.
Set Up Your Breading Station
- Arrange three shallow bowls or plates in a line: one with flour, one with beaten egg mixture, and one with panko breadcrumbs. This assembly-line setup makes breading efficient and keeps your workspace organized. Pro tip: To keep your hands less messy, use your right hand for wet ingredients (egg) and your left hand for dry ingredients (flour and breadcrumbs)—this prevents a gummy coating on your fingers.
- Beat the eggs with 1 tablespoon of water to create a thin, pourable egg wash that coats evenly without creating thick globs. Pro tip: Fresh eggs create a better breading adhesion than older eggs, so use the freshest eggs available in your refrigerator.
Bread the Cutlets
- Working with one cutlet at a time, dredge it thoroughly in flour, shaking off excess. This light flour coating helps the egg adhere better to the meat. Pro tip: Don't skip the flour step—this three-step breading process is what separates restaurant-quality results from soggy homemade attempts.
- Dip the floured cutlet into the egg wash, turning to coat both sides completely and allowing excess to drip back into the bowl. Pro tip: Make sure the egg reaches every corner and edge—any exposed flour or meat will create weak spots in the final crust.
- Transfer to the breadcrumbs and press gently, turning to coat all sides thoroughly. Gently press the breadcrumbs into the egg coating with your fingers—you want them to adhere firmly. Pro tip: For extra crispy results, place the breaded cutlet back in the egg wash for a quick second dip, then back into the breadcrumbs for a double-breaded effect.
- Place breaded cutlets on a clean plate and let rest for 10-15 minutes. This resting period allows the breading to adhere properly and creates a better crust during cooking. Pro tip: Don't skip this resting time—I know it feels like it's slowing you down, but those 10 minutes make a dramatic difference in the final texture.
Heat Your Pan and Oil
- Place a large skillet over medium-high heat and add the butter and vegetable oil. The combination of butter (for flavor) and oil (for higher smoke point) creates ideal frying conditions. Pro tip: The oil should be shimmering and moving around the pan, but not yet smoking. If you're at the smoking stage, your pan is too hot and will burn the breading.
- Test the oil temperature by carefully dropping a small piece of breadcrumb into the pan. If it sizzles immediately and browns in about 15-20 seconds, your oil is ready. Pro tip: Ideally, your oil should reach 350-375°F. If you have a kitchen thermometer, this is where it becomes invaluable.
Pan-Fry the Schnitzel
- Carefully place two breaded cutlets into the hot oil (cooking in batches prevents overcrowding and temperature drops). You should hear an immediate, vigorous sizzle upon contact. Pro tip: Never crowd the pan—give each cutlet room to cook evenly. Overcrowding drops the oil temperature and creates steam instead of a crispy crust.
- Cook for 3-4 minutes without moving the cutlets, allowing the bottom side to turn golden brown. This initial undisturbed cooking creates that signature crispy crust. Pro tip: Listen and watch—the sizzle should remain steady. If it becomes quiet, your oil has cooled too much. If it sounds violent, it's too hot.
- Flip the cutlets carefully and cook for another 3-4 minutes until the second side is equally golden brown. The entire cutlet should be light golden, not dark brown. Pro tip: Flip only once—resisting the urge to flip repeatedly is what separates home cooks from professionals. Trust the process.
- Transfer cooked schnitzel to a paper towel-lined plate or wire rack to drain excess oil. The paper towels absorb surface grease without softening the crust (unlike keeping them in a warm oven). Pro tip: A wire cooling rack is actually better than paper towels if you have one—it allows air circulation underneath and truly keeps the crust crispy.
- Repeat with the remaining two cutlets, adding a bit more oil if needed to maintain the temperature. Pro tip: Keep cooked schnitzel warm in a 200°F oven on a baking sheet if you're staggering the cooking process.
Plate and Serve
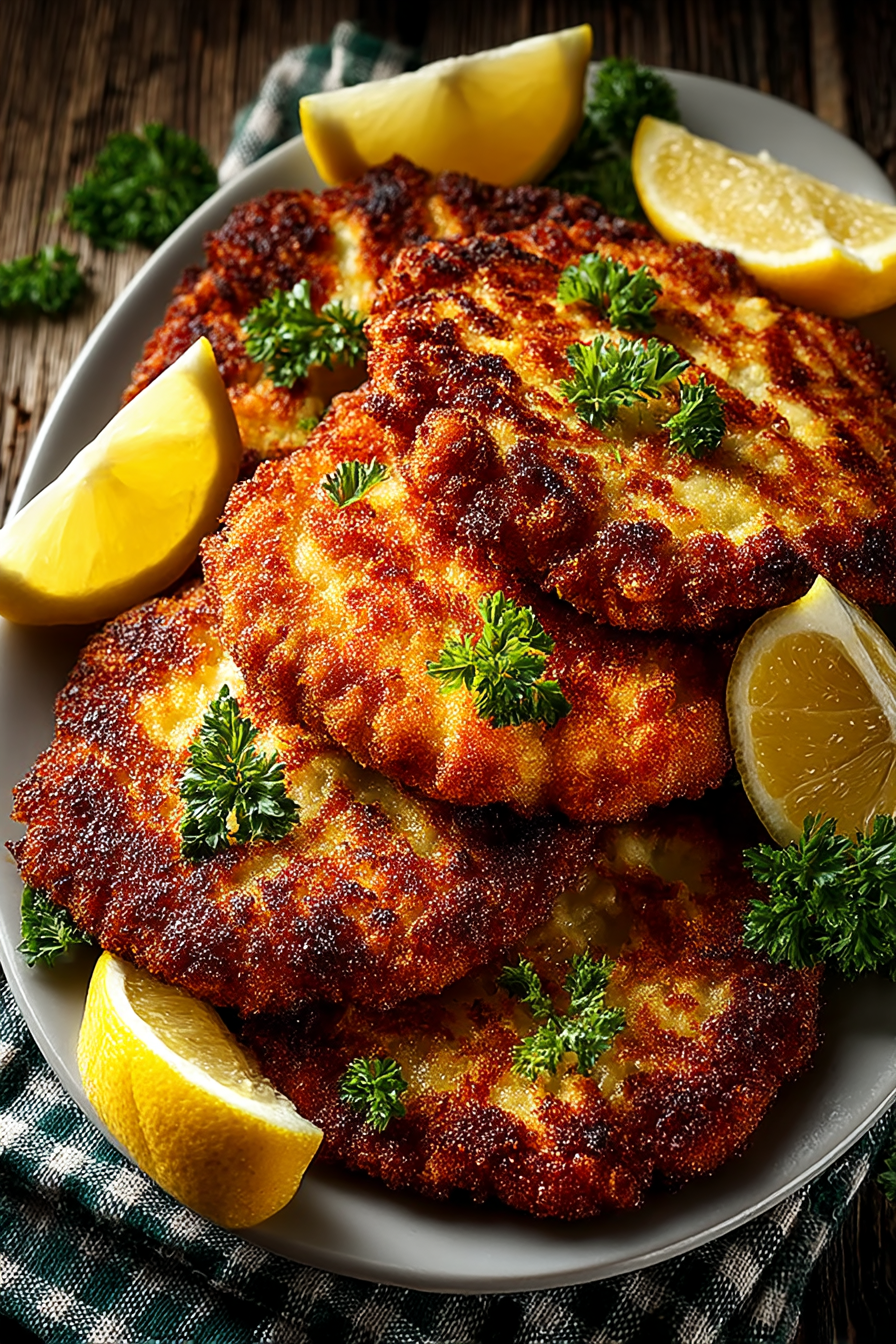
- Arrange the golden schnitzel cutlets on serving plates, garnish with fresh chopped parsley, and serve immediately with fresh lemon wedges on the side. Pro tip: Squeeze fresh lemon juice over the schnitzel just before eating—the acidity cuts through the richness of the fried crust beautifully.
Notes
- Pat pork completely dry before breading—moisture is the enemy of crispiness. Do this 15-20 minutes before breading if possible to allow surface moisture to evaporate naturally.
- Maintain oil temperature between 350-375°F throughout cooking. If oil is too cool, schnitzel absorbs oil and becomes greasy; if too hot, the breading burns before the meat cooks through.
- Don't skip the 10-15 minute resting period after breading but before cooking. This allows the breading to set and adhere properly, dramatically improving the final texture and crispiness.