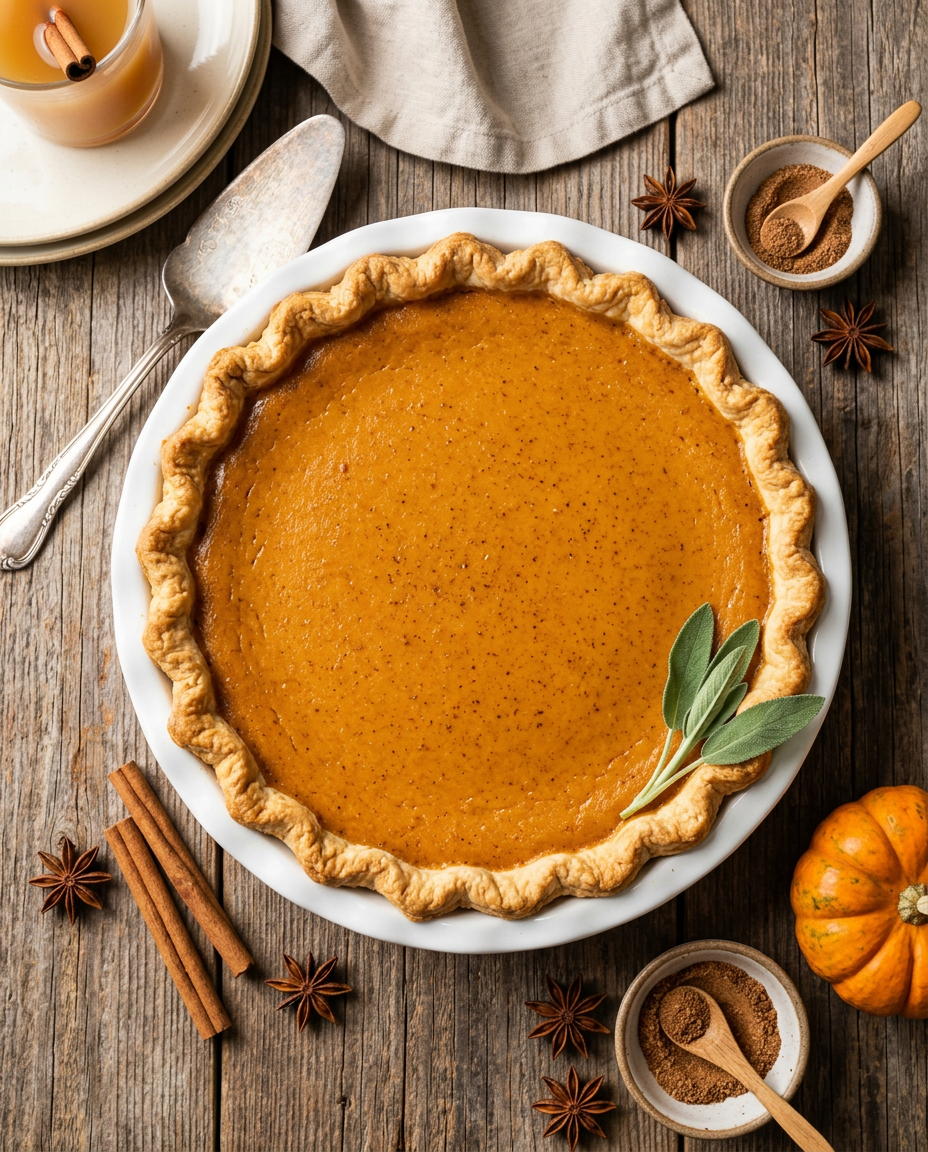
There’s nothing quite like a classic Libby’s pumpkin pie recipe to bring warmth and tradition to your holiday table. For generations, this trusted recipe has been the gold standard for creating the perfect pumpkin pie with its silky smooth filling and perfectly spiced flavor profile that captures the essence of fall in every bite.
What makes this recipe so special is its foolproof approach – using Libby’s 100% pure pumpkin puree as the base, combined with the ideal blend of warm spices and a custard-like texture that sets beautifully every time. Whether you’re a seasoned baker or attempting your first homemade pumpkin pie, this traditional recipe delivers consistent, restaurant-quality results that will have your family asking for seconds.
I’ve been making this beloved recipe for over a decade, and it never fails to impress. The secret lies in the perfect balance of ingredients and technique that creates that signature smooth, creamy texture with just the right amount of spice warmth.
Why You’ll Love This Libby’s Pumpkin Pie Recipe
- Foolproof Results: This tried-and-true recipe works every single time, making it perfect for both beginners and experienced bakers
- Classic Flavor: Features the traditional taste that everyone expects from a perfect pumpkin pie, with warm spices that complement rather than overpower
- Simple Ingredients: Uses easily accessible pantry staples and Libby’s pumpkin puree for consistent quality
- Make-Ahead Friendly: Can be prepared up to two days in advance, making holiday meal planning stress-free
- Silky Smooth Texture: Creates that perfect custard-like consistency that’s neither too firm nor too soft
- Holiday Tradition: This is the recipe that creates lasting memories and becomes a treasured family tradition
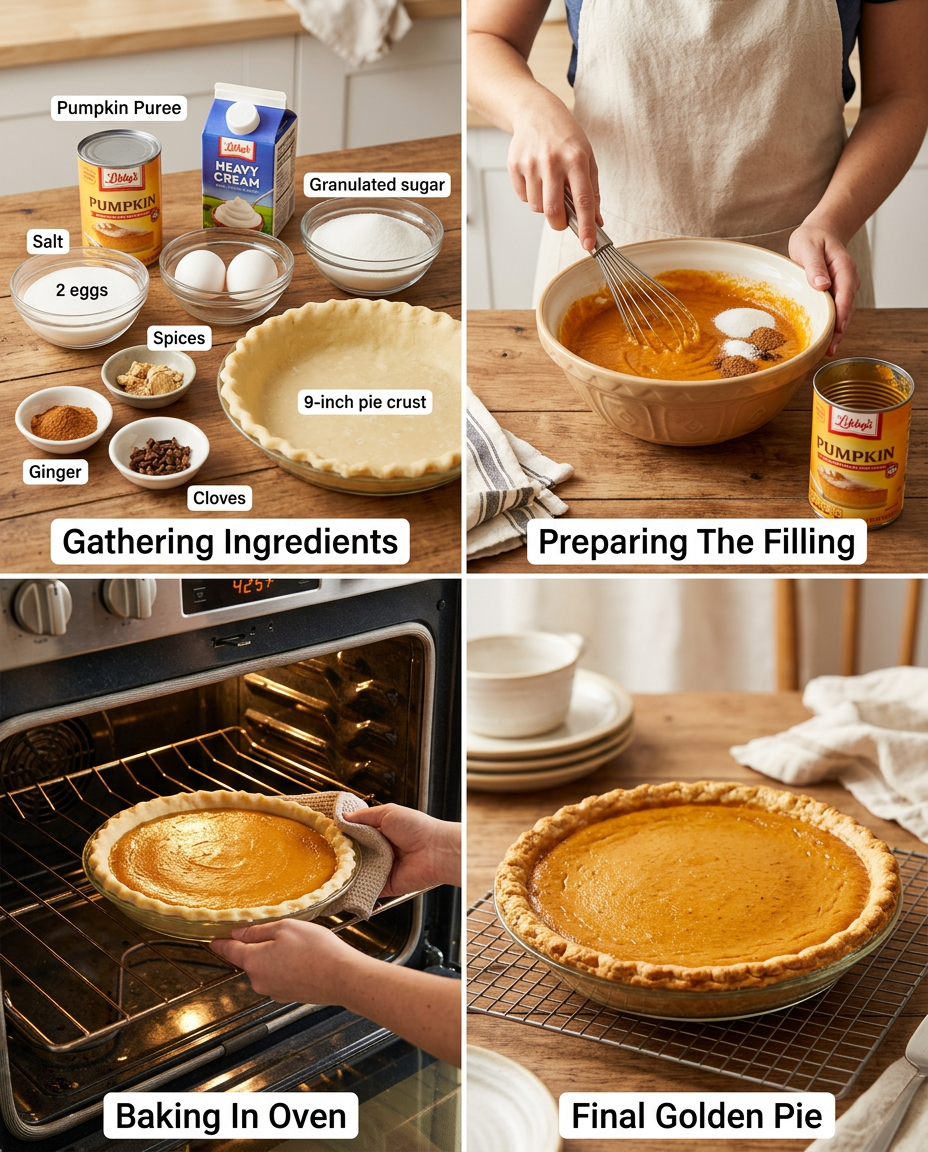
Ingredients You’ll Need
The beauty of this classic pumpkin pie lies in its straightforward ingredient list. Each component plays a crucial role in creating the perfect texture and flavor balance. Libby’s 100% pure pumpkin puree provides the ideal consistency and rich pumpkin flavor, while the combination of evaporated milk and eggs creates that signature creamy custard base.
The pumpkin pie spices – cinnamon, ginger, nutmeg, and cloves – work together to create that warm, comforting flavor we all associate with fall. Using fresh spices makes a noticeable difference in the final result, so check your spice rack and replace any that have been sitting around for more than a year.
For the Pie Crust
- 1 piece unbaked 9-inch pie crust (store-bought or homemade)
For the Pumpkin Pie Filling
- 3/4 cup granulated sugar
- 1/2 teaspoon salt
- 1 teaspoon ground cinnamon
- 1/2 teaspoon ground ginger
- 1/4 teaspoon ground nutmeg
- 1/8 teaspoon ground cloves
- 2 large eggs (room temperature)
- 1 can Libby’s 100% Pure Pumpkin (15 oz can)
- 1 can evaporated milk (12 fl oz can)
Optional Add-ins:
- whipped cream
- vanilla ice cream
- caramel sauce
How to Make Libby’s Pumpkin Pie Recipe (Step-by-Step)
1. Prepare for Baking
Preheat your oven to 425°F (220°C). If using a frozen pie crust, let it thaw according to package directions.
Pro tip: Starting with a hot oven helps set the crust quickly and prevents a soggy bottom.
2. Mix the Spice Blend
In a small bowl, whisk together the sugar, salt, cinnamon, ginger, nutmeg, and cloves until well combined.
Pro tip: Mixing the dry ingredients first ensures even distribution of spices throughout the pie.
3. Prepare the Filling
In a large mixing bowl, lightly beat the eggs with a wire whisk.
Pro tip: Don’t overbeat the eggs – you want them just combined to avoid incorporating too much air.
Stir in the pumpkin puree and the spice mixture until smooth.
Pro tip: Make sure the pumpkin is at room temperature for easier mixing.
Gradually stir in the evaporated milk until the mixture is completely smooth and well blended.
Pro tip: Add the milk slowly while stirring to prevent lumps from forming.
4. Assemble and Initial Bake
Pour the pumpkin mixture into the unbaked pie crust. Gently tap the pie pan on the counter to release any air bubbles.
Pro tip: A smooth surface helps the pie bake evenly and look professional.
Bake at 425°F for 15 minutes.
Pro tip: This high initial temperature helps set the crust and prevents shrinkage.
5. Finish Baking
Reduce the oven temperature to 350°F (175°C) and continue baking for 40-50 minutes, or until a knife inserted near the center comes out clean.
Pro tip: The center should be just set but still slightly jiggly – it will continue to firm up as it cools.
If the crust edges begin to brown too much, cover them with strips of aluminum foil.
Pro tip: Check the edges around the 30-minute mark to prevent over-browning.
6. Cool and Serve
Cool the pie on a wire rack for 2 hours before serving. For best results, refrigerate for at least 4 hours or overnight.
Pro tip: The pie needs time to fully set – cutting too early will result in a runny filling.
Libby’s Pumpkin Pie Recipe – Full Recipe
Libby's Pumpkin Pie Recipe
Ingredients
Equipment
Method
- Preheat your oven to 425°F (220°C). If using a frozen pie crust, let it thaw according to package directions. Pro tip: Starting with a hot oven helps set the crust quickly and prevents a soggy bottom.
- In a small bowl, whisk together the sugar, salt, cinnamon, ginger, nutmeg, and cloves until well combined. Pro tip: Mixing the dry ingredients first ensures even distribution of spices throughout the pie.
- In a large mixing bowl, lightly beat the eggs with a wire whisk. Pro tip: Don't overbeat the eggs – you want them just combined to avoid incorporating too much air.
- Stir in the pumpkin puree and the spice mixture until smooth. Pro tip: Make sure the pumpkin is at room temperature for easier mixing.
- Gradually stir in the evaporated milk until the mixture is completely smooth and well blended. Pro tip: Add the milk slowly while stirring to prevent lumps from forming.
- Pour the pumpkin mixture into the unbaked pie crust. Gently tap the pie pan on the counter to release any air bubbles. Pro tip: A smooth surface helps the pie bake evenly and look professional.
- Bake at 425°F for 15 minutes. Pro tip: This high initial temperature helps set the crust and prevents shrinkage.
- Reduce the oven temperature to 350°F (175°C) and continue baking for 40-50 minutes, or until a knife inserted near the center comes out clean. Pro tip: The center should be just set but still slightly jiggly – it will continue to firm up as it cools.
- If the crust edges begin to brown too much, cover them with strips of aluminum foil. Pro tip: Check the edges around the 30-minute mark to prevent over-browning.
- Cool the pie on a wire rack for 2 hours before serving. For best results, refrigerate for at least 4 hours or overnight. Pro tip: The pie needs time to fully set – cutting too early will result in a runny filling.
Notes
- Make sure eggs and pumpkin are at room temperature for the smoothest mixing
- Don't overbake - the center should still jiggle slightly when removing from oven
- Store finished pie covered in refrigerator for up to 4 days
Tips for the Best Libby’s Pumpkin Pie Recipe
- Room Temperature Ingredients: Bring eggs and pumpkin to room temperature before mixing for the smoothest filling
- Prevent Cracks: Don’t overbake – the center should still jiggle slightly when you remove it from the oven
- Test for Doneness: Insert a knife about 1 inch from the center; if it comes out clean, the pie is ready
- Crust Protection: Create foil shields by cutting out the center of aluminum foil circles to protect just the edges
- Storage Success: Always store the finished pie in the refrigerator – this prevents bacterial growth and maintains texture
- Clean Slices: Wipe your knife clean between cuts and use a sharp, thin blade for the cleanest slices
Variations to Try
- Bourbon Pumpkin Pie: Add 2 tablespoons of bourbon to the filling for a sophisticated adult twist
- Maple Pumpkin Pie: Replace 1/4 cup of sugar with pure maple syrup for rich, complex sweetness
- Gingersnap Crust: Use a crushed gingersnap cookie crust instead of traditional pastry for extra spice
- Mini Pumpkin Pies: Divide filling among 12 muffin cups lined with pie crust for individual servings
- Dairy-Free Version: Substitute coconut milk for evaporated milk and use a vegan pie crust
Storage and Meal Prep Tips
- Refrigerator Storage: Store covered in the refrigerator for up to 4 days – wrap loosely with plastic wrap or store in an airtight container
- Freezer Storage: Freeze whole pie for up to 2 months wrapped tightly in plastic wrap and aluminum foil
- Thawing Instructions: Thaw frozen pie overnight in refrigerator before serving – never thaw at room temperature
- Make-Ahead Tips: Bake pie up to 2 days in advance and store refrigerated; the flavors actually improve overnight
- Serving Temperature: Serve chilled or at room temperature – let refrigerated pie sit 30 minutes before serving for best flavor
Nutritional Benefits
This traditional pumpkin pie offers more than just incredible taste – it’s packed with nutritious ingredients that provide valuable vitamins and minerals. Pumpkin is naturally rich in beta-carotene, which converts to vitamin A in your body, supporting eye health and immune function.
- High in Vitamin A for healthy vision and immune support
- Good source of fiber for digestive health
- Contains potassium for heart health
- Provides calcium and protein from eggs and evaporated milk
- Rich in antioxidants from pumpkin and warm spices
- Contains iron and magnesium for energy metabolism
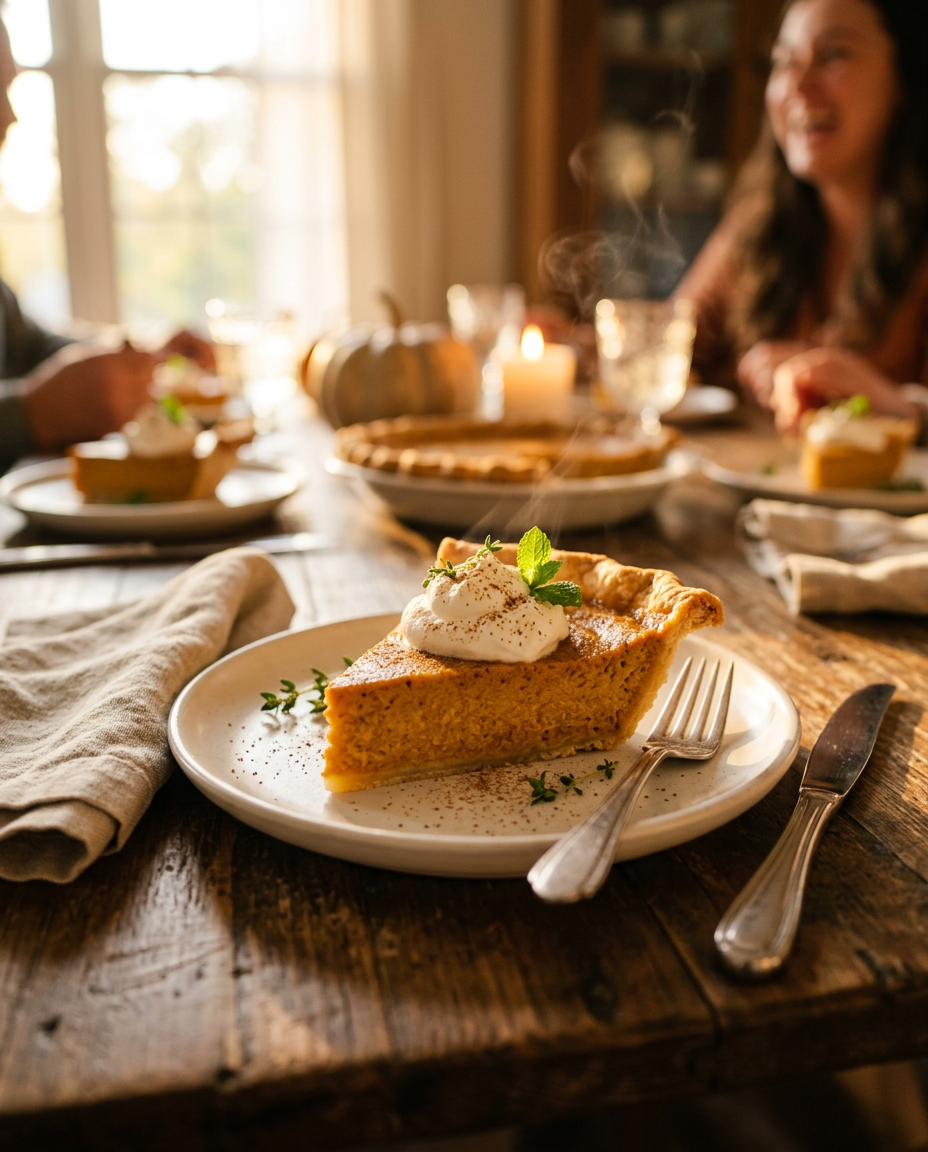
What to Serve With Libby’s Pumpkin Pie Recipe
- Classic Whipped Cream: Light, airy homemade whipped cream with a touch of vanilla
- Vanilla Bean Ice Cream: The cool creaminess perfectly complements the warm spices
- Caramel Drizzle: A warm caramel sauce adds extra indulgence and sweetness
- Candied Pecans: Crunchy, sweet nuts provide textural contrast
- Coffee or Espresso: The rich, bitter notes balance the pie’s sweetness beautifully
Frequently Asked Questions
Can I make Libby’s pumpkin pie ahead of time?
Yes, you can make this pumpkin pie up to 2 days in advance. Store it covered in the refrigerator, and the flavors will actually improve overnight. For best results, add any toppings like whipped cream just before serving.
Why is my pumpkin pie cracking on top?
Pumpkin pie cracks when it’s overbaked or baked at too high a temperature for too long. The filling should still jiggle slightly in the center when you remove it from the oven. It will continue to set as it cools.
Can I use fresh pumpkin instead of canned pumpkin?
While you can use fresh pumpkin puree, Libby’s canned pumpkin is specifically processed for baking and provides more consistent results. If using fresh pumpkin, make sure to strain out excess moisture for the best texture.
How do I know when my pumpkin pie is done baking?
Insert a knife about 1 inch from the center of the pie. If it comes out clean, the pie is done. The center should still be slightly jiggly but not liquid. The pie will continue to set as it cools.
Can I freeze pumpkin pie?
Yes, you can freeze pumpkin pie for up to 2 months. Wrap the cooled pie tightly in plastic wrap and aluminum foil. Thaw overnight in the refrigerator before serving. The texture may be slightly different but still delicious.
Final Thoughts
This classic Libby’s pumpkin pie recipe truly embodies everything we love about traditional holiday baking. It’s reliable, delicious, and creates those warm memories that make the holidays special. The combination of silky smooth texture and perfectly balanced spices makes this easy pumpkin pie recipe a standout dessert that will become a treasured part of your family traditions.
Whether you’re preparing your first Thanksgiving pumpkin pie or you’re a seasoned baker looking for that perfect go-to recipe, this homemade pumpkin pie delivers consistent, impressive results every time. The beauty lies in its simplicity – quality ingredients combined with time-tested technique create a holiday pumpkin dessert that’s simply unmatched.
Ready to Try It?
Ready to create the perfect centerpiece for your holiday dessert table? This traditional pumpkin pie recipe is waiting to become part of your family’s cherished traditions. Gather your ingredients, preheat that oven, and get ready to fill your kitchen with the warm, inviting aromas of the season. Your family and friends will be talking about this pie long after the last slice is gone!