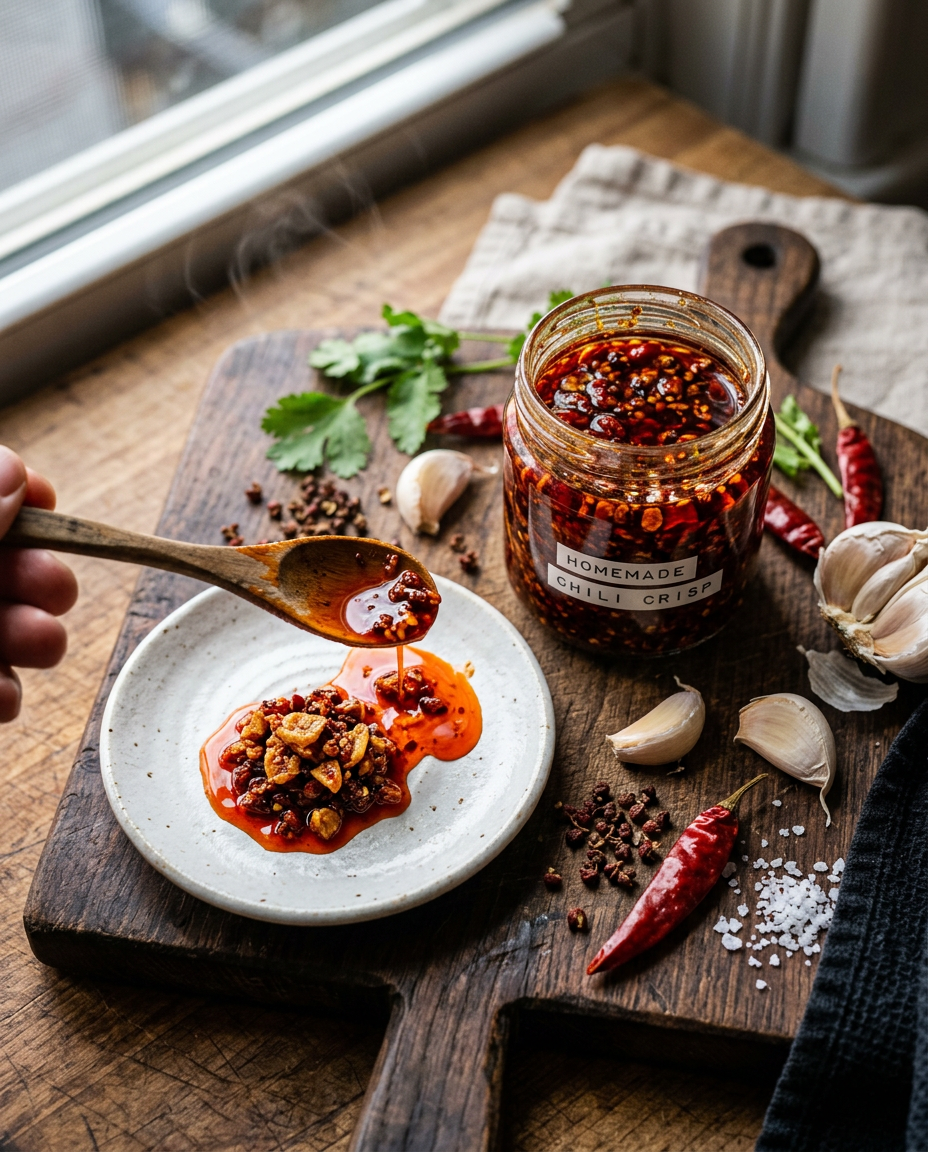
Making your own homemade chili crisp is one of the most rewarding culinary adventures you’ll ever embark on. This intensely flavorful Chinese condiment has taken the world by storm, and once you taste the complex layers of heat, nuttiness, and aromatic spices in your own kitchen-made version, you’ll understand why it’s become such an obsession for food lovers everywhere.
Unlike store-bought versions, this homemade chili crisp allows you to control every element – from the level of heat to the texture of those irresistible crispy bits that make this sauce so addictive. The combination of multiple chili varieties, aromatic spices, and that signature crunch creates a condiment that transforms everything it touches.
What makes this recipe special is the careful balance of ingredients and the traditional technique that ensures maximum flavor extraction. You’ll be amazed at how this spicy chili oil elevates everything from dumplings to pizza, and how those crispy bits add texture and depth to even the simplest dishes.
Why You’ll Love This The Ultimate Homemade Chili Crisp Recipe
- Incredible Flavor Complexity: Multiple chili varieties and aromatic spices create layers of heat, smokiness, and umami that dance on your palate
- Perfect Texture Balance: The combination of silky oil and crispy bits provides both smoothness and satisfying crunch in every spoonful
- Customizable Heat Level: Control the spiciness by adjusting chili types and quantities to match your tolerance perfectly
- Versatile Kitchen Staple: Works as a condiment, cooking ingredient, or finishing sauce for countless dishes
- Long Shelf Life: Properly stored, this homemade version keeps for months, getting even better with time
- Cost-Effective: Making your own saves money compared to premium store-bought versions while delivering superior flavor
Ingredients You’ll Need
The magic of chili crisp lies in its carefully selected ingredients, each playing a crucial role in the final flavor profile. The foundation starts with high-quality neutral oil that can withstand high heat without breaking down, while multiple chili varieties provide different heat levels and flavor notes.
Aromatics like garlic, shallots, and ginger add depth and complexity, while spices such as Sichuan peppercorns contribute that distinctive numbing sensation. The key to exceptional chili crisp ingredients is using the freshest spices possible and taking time to properly prepare each component for maximum flavor extraction.
For the Oil Base
- 2 cups neutral oil (vegetable or canola oil)
- 1/4 cup sesame oil (for flavor)
For the Chili Blend
- 1/2 cup Korean gochugaru flakes (coarsely ground)
- 2 tablespoons Kashmiri chili powder (for color and mild heat)
- 1 tablespoon cayenne pepper (adjust to taste)
- 2 tablespoons paprika (sweet or smoked)
For the Aromatics and Crispy Bits
- 8 cloves garlic (thinly sliced)
- 2 large shallots (thinly sliced)
- 2 inch fresh ginger (julienned)
- 2 tablespoons Sichuan peppercorns (whole)
- 2 bay leaves bay leaves (dried)
- 1 cinnamon stick cinnamon stick (small piece)
For Seasoning
- 2 tablespoons soy sauce (light or dark)
- 1 tablespoon black vinegar (or rice vinegar)
- 1 teaspoon sugar (to balance flavors)
- 1 teaspoon salt (or to taste)
Optional Add-ins:
- peanuts
- sesame seeds
- dried shiitake mushrooms
- fermented black beans
How to Make The Ultimate Homemade Chili Crisp Recipe (Step-by-Step)
1. Prepare the Chili Mix
In a large heatproof bowl, combine gochugaru, Kashmiri chili powder, cayenne, and paprika. Whisk together until evenly mixed. Set aside near your cooking area.
Pro tip: Mix the chilies in advance to ensure even distribution when the hot oil is added.
Add soy sauce, black vinegar, sugar, and salt to the chili mixture. Stir well to create a paste-like consistency.
Pro tip: The liquid ingredients help prevent the chilies from burning when the hot oil is added.
2. Prepare the Aromatics
Slice garlic cloves and shallots as thinly and uniformly as possible. Julienne the ginger into thin matchsticks. Pat all aromatics completely dry with paper towels.
Pro tip: Uniform slicing ensures even cooking and prevents some pieces from burning while others remain undercooked.
Lightly crush Sichuan peppercorns using the flat side of a knife or mortar and pestle. This releases their aromatic oils more effectively.
Pro tip: Crushing the peppercorns just before use maximizes their numbing sensation and fragrance.
3. Heat the Oil and Aromatics
In a heavy-bottomed saucepan, combine neutral oil and sesame oil. Heat over medium-low heat to 275°F (135°C). Add garlic, shallots, and ginger. Cook slowly, stirring occasionally, until golden and crispy, about 15-20 minutes.
Pro tip: Low and slow cooking is crucial – rushing this step will result in burnt aromatics and bitter flavors.
Add Sichuan peppercorns, bay leaves, and cinnamon stick. Continue cooking for another 5 minutes until fragrant. The oil should bubble gently around the spices.
Pro tip: The spices are done when they become deeply aromatic and the oil carries their fragrance throughout your kitchen.
4. Combine Oil and Chilies
Remove the saucepan from heat and let cool for 30 seconds. Carefully pour about 1/3 of the hot oil mixture over the chili paste, whisking immediately to prevent clumping.
Pro tip: Adding the oil in stages prevents the chilies from burning and allows better control over the final texture.
Wait 1 minute, then add another third of the oil, whisking vigorously. Finally, add the remaining oil and aromatics, including all the crispy bits. Stir well to combine.
Pro tip: The gradual addition creates the perfect balance of cooked and raw chili flavors that makes great chili crisp so complex.
5. Final Seasoning and Cooling
Taste the mixture and adjust seasoning as needed. Remove bay leaves and cinnamon stick. Let cool completely at room temperature, stirring occasionally, about 2 hours.
Pro tip: The flavors will continue to develop as it cools, so taste again before final storage adjustments.
Once cooled, transfer to clean glass jars, ensuring crispy bits are evenly distributed. The oil should cover the solids by at least 1/4 inch.
Pro tip: Proper oil coverage prevents oxidation and extends shelf life significantly.
The Ultimate Homemade Chili Crisp Recipe – Full Recipe
The Ultimate Homemade Chili Crisp Recipe
Ingredients
Equipment
Method
- In a large heatproof bowl, combine gochugaru, Kashmiri chili powder, cayenne, and paprika. Whisk together until evenly mixed. Set aside near your cooking area. Pro tip: Mix the chilies in advance to ensure even distribution when the hot oil is added.
- Add soy sauce, black vinegar, sugar, and salt to the chili mixture. Stir well to create a paste-like consistency. Pro tip: The liquid ingredients help prevent the chilies from burning when the hot oil is added.
- Slice garlic cloves and shallots as thinly and uniformly as possible. Julienne the ginger into thin matchsticks. Pat all aromatics completely dry with paper towels. Pro tip: Uniform slicing ensures even cooking and prevents some pieces from burning while others remain undercooked.
- Lightly crush Sichuan peppercorns using the flat side of a knife or mortar and pestle. This releases their aromatic oils more effectively. Pro tip: Crushing the peppercorns just before use maximizes their numbing sensation and fragrance.
- In a heavy-bottomed saucepan, combine neutral oil and sesame oil. Heat over medium-low heat to 275°F (135°C). Add garlic, shallots, and ginger. Cook slowly, stirring occasionally, until golden and crispy, about 15-20 minutes. Pro tip: Low and slow cooking is crucial - rushing this step will result in burnt aromatics and bitter flavors.
- Add Sichuan peppercorns, bay leaves, and cinnamon stick. Continue cooking for another 5 minutes until fragrant. The oil should bubble gently around the spices. Pro tip: The spices are done when they become deeply aromatic and the oil carries their fragrance throughout your kitchen.
- Remove the saucepan from heat and let cool for 30 seconds. Carefully pour about 1/3 of the hot oil mixture over the chili paste, whisking immediately to prevent clumping. Pro tip: Adding the oil in stages prevents the chilies from burning and allows better control over the final texture.
- Wait 1 minute, then add another third of the oil, whisking vigorously. Finally, add the remaining oil and aromatics, including all the crispy bits. Stir well to combine. Pro tip: The gradual addition creates the perfect balance of cooked and raw chili flavors that makes great chili crisp so complex.
- Taste the mixture and adjust seasoning as needed. Remove bay leaves and cinnamon stick. Let cool completely at room temperature, stirring occasionally, about 2 hours. Pro tip: The flavors will continue to develop as it cools, so taste again before final storage adjustments.
- Once cooled, transfer to clean glass jars, ensuring crispy bits are evenly distributed. The oil should cover the solids by at least 1/4 inch. Pro tip: Proper oil coverage prevents oxidation and extends shelf life significantly.
Notes
- Keep oil temperature between 275-300°F to prevent burning aromatics
- Let cool completely before storing - flavors develop and improve over 24 hours
- Always use clean, dry utensils to extend shelf life and prevent contamination
Tips for the Best The Ultimate Homemade Chili Crisp Recipe
- Temperature Control: Keep oil temperature between 275-300°F – too hot and the aromatics burn, too cool and they won’t crisp properly
- Moisture Management: Ensure all aromatics are completely dry before frying to prevent dangerous oil splattering
- Quality Matters: Use the freshest spices possible, as stale spices will result in dull, flat flavors
- Storage Wisdom: Always use clean, dry utensils when serving to prevent contamination and extend shelf life
- Flavor Development: Let the chili crisp rest for at least 24 hours before using – the flavors meld and improve dramatically
- Customization Key: Start with less heat and add more chilies in subsequent batches to find your perfect spice level
Variations to Try
- Sichuan Style: Double the Sichuan peppercorns and add fermented black beans for authentic numbing heat and umami depth
- Smoky Version: Use chipotle powder instead of paprika and add a pinch of liquid smoke for BBQ-style complexity
- Nutty Crisp: Add chopped peanuts, cashews, or fried shallots during the final mixing stage for extra crunch and richness
- Umami Bomb: Include diced dried shiitake mushrooms and a tablespoon of fish sauce for incredible savory depth
- Sweet Heat: Add a tablespoon of honey or maple syrup for a sweet-spicy balance that’s perfect with grilled meats
Storage and Meal Prep Tips
- Refrigerator Storage: Keeps for up to 6 months in the refrigerator in airtight glass containers – flavors actually improve with time
- Room Temperature: Can be stored at room temperature for up to 1 month if kept in a cool, dark place away from direct sunlight
- Freezer Storage: Freeze in ice cube trays for portion control, then transfer to freezer bags for up to 1 year
- Serving Temperature: No reheating necessary – serve at room temperature for best flavor and oil consistency
- Meal Prep Friendly: Make double batches and gift jars to friends – it’s the perfect homemade present that everyone appreciates
Nutritional Benefits
This homemade chili crisp provides numerous health benefits beyond its incredible flavor. The capsaicin in chili peppers offers natural pain relief, boosts metabolism, and provides anti-inflammatory properties, while garlic and ginger contribute immune-boosting compounds and digestive support.
- Rich in antioxidants from multiple chili varieties and aromatic spices
- Capsaicin may help boost metabolism and support weight management
- Garlic provides allicin, known for its antimicrobial and heart-healthy properties
- Ginger offers anti-inflammatory compounds and digestive benefits
- Healthy fats from oil support nutrient absorption and satiety
- Sichuan peppercorns contain compounds that may support circulation
What to Serve With The Ultimate Homemade Chili Crisp Recipe
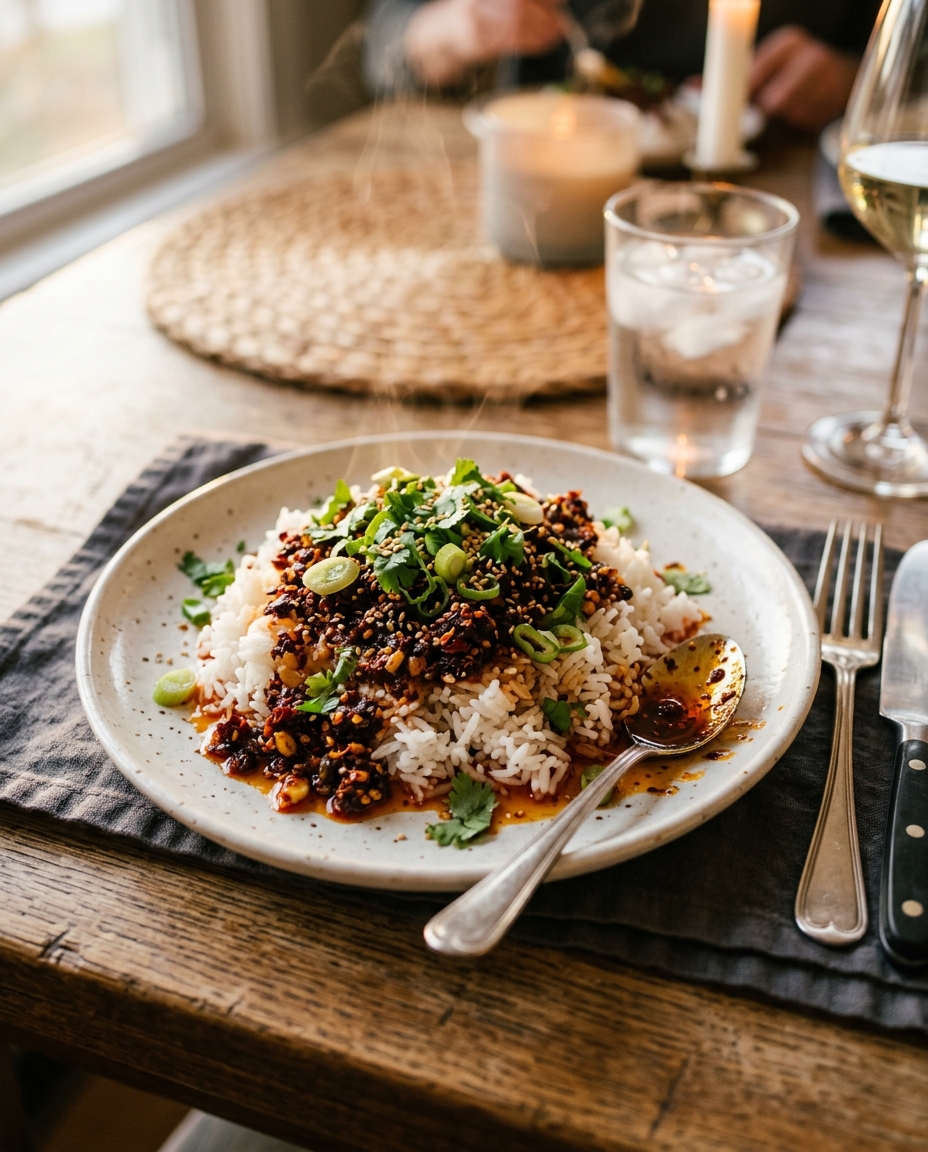
- Drizzle over steamed dumplings, noodles, or rice for instant flavor transformation
- Stir into scrambled eggs or fried rice for a spicy breakfast or dinner upgrade
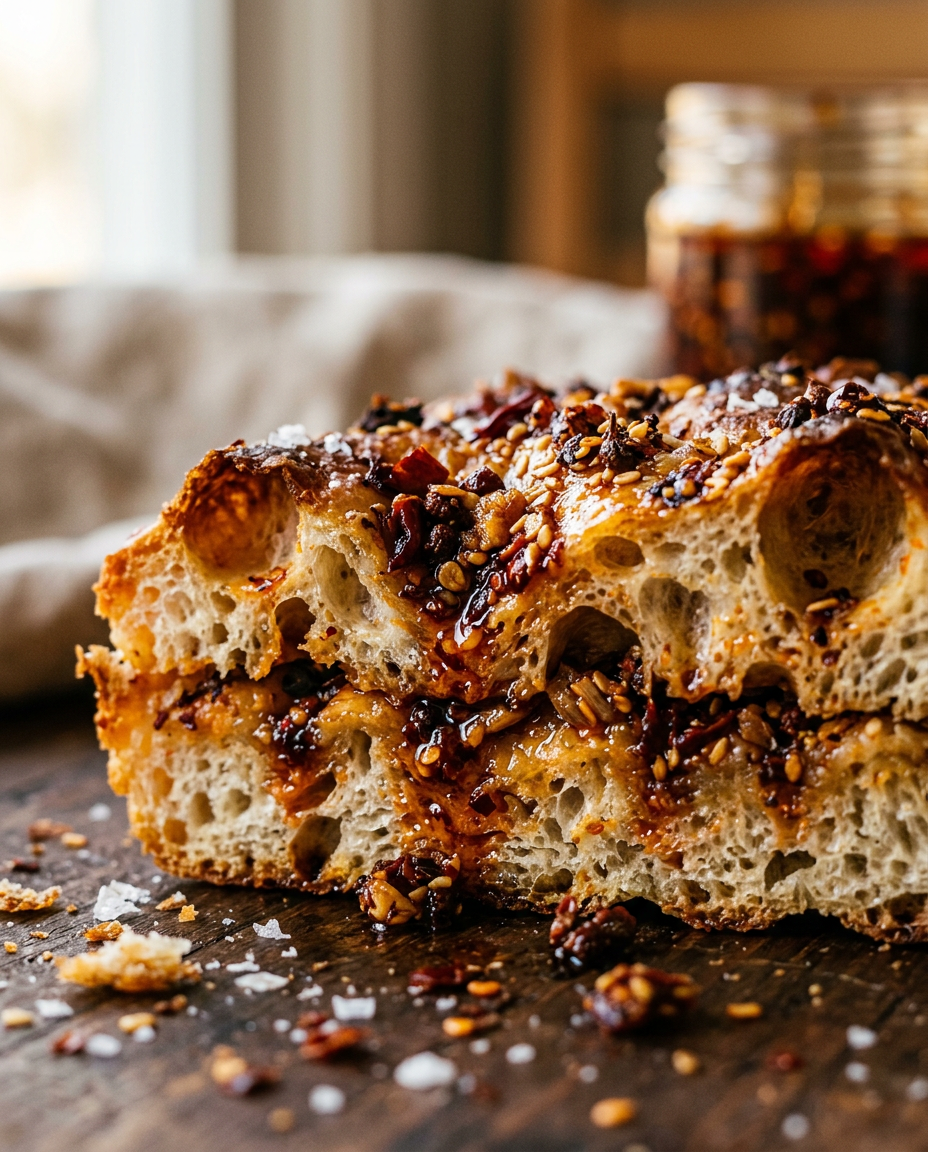
- Use as a pizza topping or mix into pasta sauce for fusion cuisine excitement
- Spoon over grilled meats, roasted vegetables, or simple steamed fish
- Mix with mayo for a spicy sandwich spread or burger condiment
- Add to soups, stews, or ramen for depth and heat that builds with each spoonful
Frequently Asked Questions
How long does homemade chili crisp last?
Properly stored homemade chili crisp lasts up to 6 months in the refrigerator or 1 month at room temperature. The high oil content acts as a preservative, and the flavors actually improve over time. Always use clean, dry utensils to prevent contamination.
Can I make chili crisp less spicy?
Yes! Reduce the cayenne pepper and use more mild chilies like Kashmiri chili powder or paprika. You can also add more oil to dilute the heat level, or increase the sugar content slightly to balance the spiciness with sweetness.
What type of oil is best for chili crisp?
Use neutral oils with high smoke points like vegetable, canola, or peanut oil for the base. Adding a small amount of sesame oil (about 10-15% of total oil) provides authentic flavor without overwhelming the dish. Avoid olive oil as it has a lower smoke point and strong flavor.
Why did my chili crisp turn bitter?
Bitter chili crisp usually results from overheating the oil or burning the aromatics. Keep oil temperature below 300°F and cook aromatics slowly over medium-low heat. If the garlic or chilies turn dark brown or black, start over as the bitter flavor cannot be fixed.
Can I substitute dried chilies for chili powder?
Yes! Use about 2-3 whole dried chilies (like chilies de arbol or dried red chilies) per tablespoon of chili powder called for. Remove stems and seeds, then crush or chop the chilies before adding to the oil. This actually creates better texture and fresher flavor.
Final Thoughts
Making your own homemade chili crisp is truly a game-changer for your cooking repertoire. The process itself is meditative and rewarding, filling your kitchen with incredible aromas that signal something special is being created. Once you taste the complex layers of heat, the satisfying crunch of perfectly crisped aromatics, and the way this spicy chili oil transforms even the simplest dishes, you’ll wonder how you ever lived without it.
The beauty of this crispy chili garlic condiment lies not just in its incredible flavor, but in its versatility and longevity. One batch provides months of meal enhancement, and every jar makes a thoughtful gift that friends and family will treasure. Don’t be surprised if people start requesting your recipe – this homemade version truly rivals any commercial Chinese condiment on the market.
Ready to Try It?
Ready to transform your cooking forever? Gather your ingredients and start your chili crisp journey today! Once you experience the incredible depth of flavor in homemade chili crisp, you’ll never want to go back to store-bought versions. Share your creations with us in the comments below – we love seeing how you customize this amazing spicy oil recipe to match your taste preferences!