Quick Answer: This New Zealand Banana Bread is an incredibly moist, perfectly sweet loaf that takes just 60 minutes to make from start to finish. A beloved Kiwi classic, it uses simple pantry ingredients and overripe bananas to create a tender, flavorful bread perfect for morning tea or afternoon snacks.
There’s something magical about the aroma of banana bread baking in a Kiwi kitchen. For generations, New Zealand banana bread has been a beloved staple in homes across the country, gracing countless morning tea tables and school lunchboxes. Unlike its American cousin which often leans sweeter and cake-like, the classic New Zealand version strikes a perfect balance between moistness and structure, delivering a tender crumb that’s never too heavy or overly sweet. This recipe draws from the legendary Edmonds Cookbook, New Zealand’s baking bible since 1907, ensuring you get an authentic taste of Kiwi home baking. The secret lies in beautiful simplicity: quality ingredients, proper technique, and those gloriously spotty bananas that everyone else might throw away but you know are pure baking gold.
Why This Recipe Works
What makes this New Zealand banana bread truly special is its heritage and thoughtful simplicity. Born from practicality during times when wasting food was unthinkable, particularly during the Depression era and post-war years, Kiwi bakers perfected the art of transforming overripe bananas into something extraordinary. The traditional approach avoids excessive sweetness, allowing natural banana flavor to shine through without being masked by sugar or competing spices.
This recipe uses melted butter rather than the creaming method, creating a denser, more tender texture that stays moist for days. The addition of baking soda as the sole leavening agent produces a characteristic close crumb that’s neither too airy like American quick breads nor too heavy like European cakes. The moderate sugar content lets you taste the fruit rather than just sweetness. The optional milk creates extra moisture without making the bread soggy, while vanilla extract adds subtle warmth. Baking at 180°C creates a beautiful golden crust while keeping the interior wonderfully moist.
Essential Tips for Perfect Banana Bread
Success with banana bread begins at the fruit bowl. Your bananas should be very ripe, ideally with skins covered in black spots and feeling soft to touch. These overripe bananas contain significantly more sugar and concentrated flavor than yellow bananas, and their softer texture mashes easily into a smooth puree. Don’t use yellow or slightly green bananas; they won’t deliver the sweetness and moisture you need. The starches in unripe bananas haven’t converted to sugars yet, which means less flavor and heavier texture. If your bananas aren’t ripe enough, bake unpeeled bananas at 160°C for fifteen to twenty minutes until the skins turn completely black.
The single most common mistake is overmixing the batter after adding the flour. Once you add the dry ingredients to the wet mixture, stir gently just until you can no longer see streaks of flour. The batter should remain slightly lumpy with a few small flour pockets visible; this is perfectly normal and desirable for the best texture. Overmixing develops gluten strands in flour, resulting in tough, dense bread with tunnels running through it. Use a gentle folding motion with a spatula or wooden spoon. Professional bakers count their stirs, typically stopping at around fifteen to twenty gentle folds.
Testing for doneness requires attention and the right technique. Insert a wooden toothpick or thin metal skewer into the very center of the loaf after forty-five minutes of baking. It should come out clean or with just a few moist crumbs clinging to it but no wet batter. The top should be deeply golden brown and spring back when gently pressed. The edges should pull away slightly from the tin sides. Remember that banana bread continues cooking slightly after removal from the oven due to carryover heat, so don’t wait for the skewer to come out completely dry.
New Zealand Banana Bread
Ingredients
Equipment
Method
- Preheat oven to 180°C (350°F) conventional bake. Grease and line a 26cm (10-inch) loaf tin with baking paper.
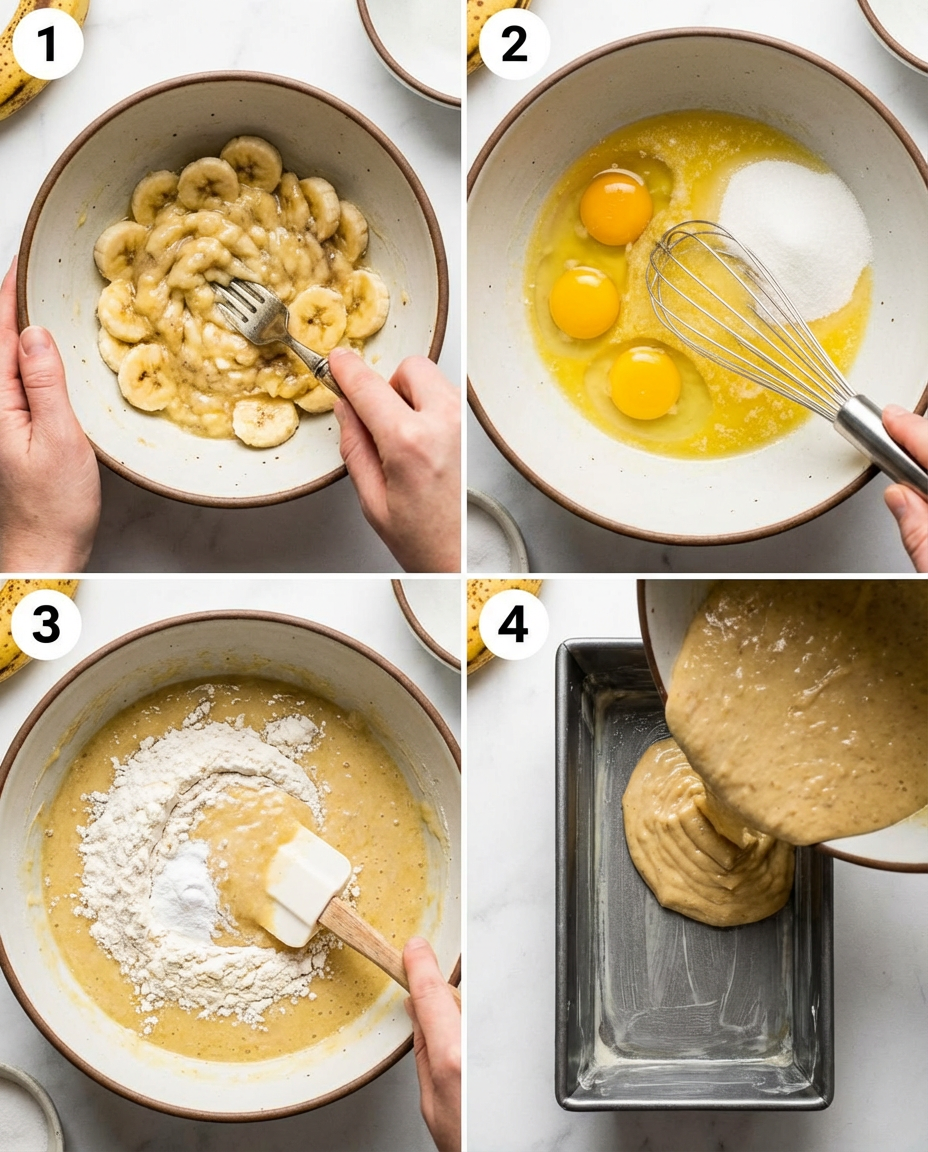
- In a large mixing bowl, mash the very ripe bananas using a fork until smooth with some small lumps remaining.
- Add the melted butter, beaten eggs, sugar, and vanilla extract to the mashed bananas. Whisk together until well combined.
- In a separate bowl, sift together the flour, baking soda, and salt.
- Add the dry ingredients to the wet banana mixture. Stir gently until just combined - do not overmix. The batter should be slightly lumpy.
- If using milk, fold it in gently at this stage for extra moisture.
- Pour the batter into the prepared loaf tin and smooth the top with a spatula.
- Bake for 45-55 minutes, or until the top is golden brown and a toothpick or skewer inserted into the center comes out clean.
- Remove from oven and let cool in the tin for 10 minutes.
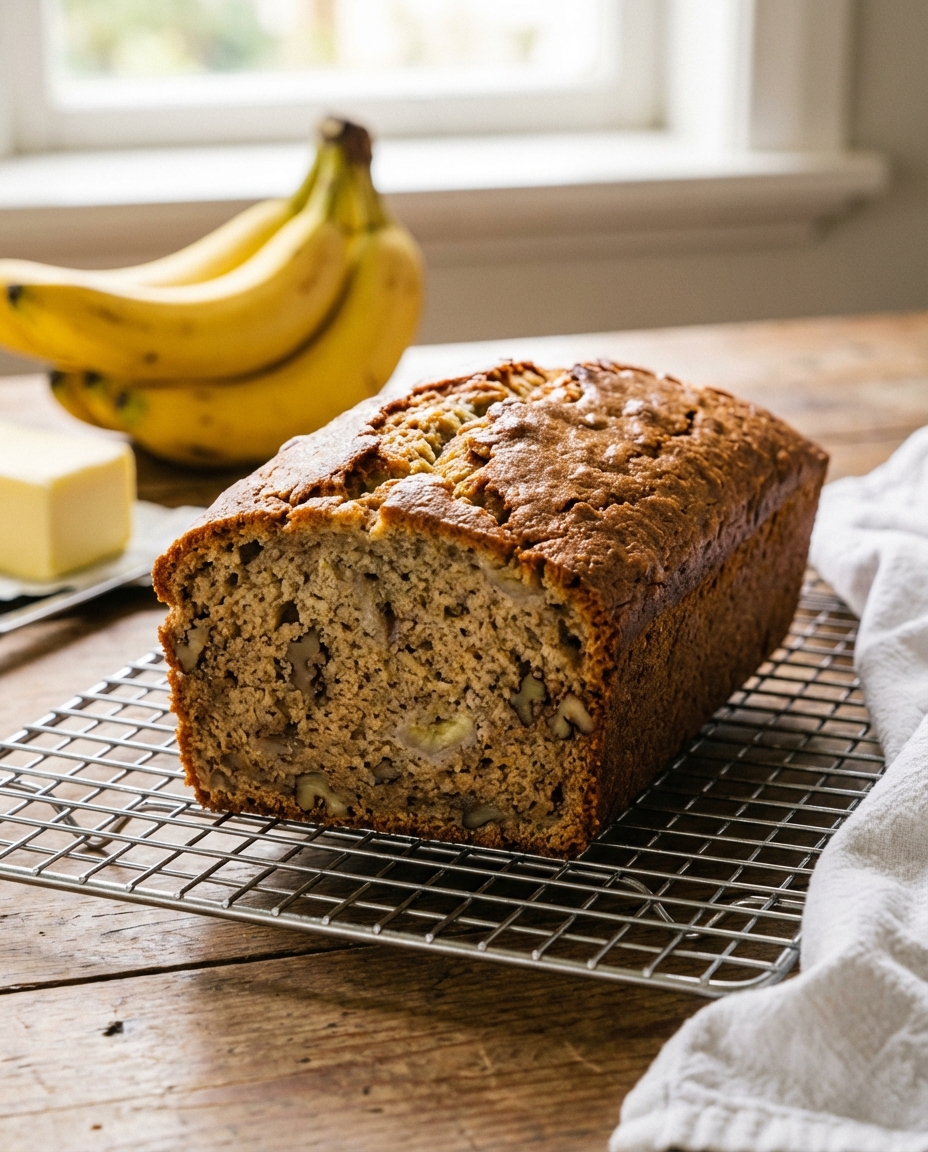
- Turn out onto a wire cooling rack and allow to cool completely before slicing.
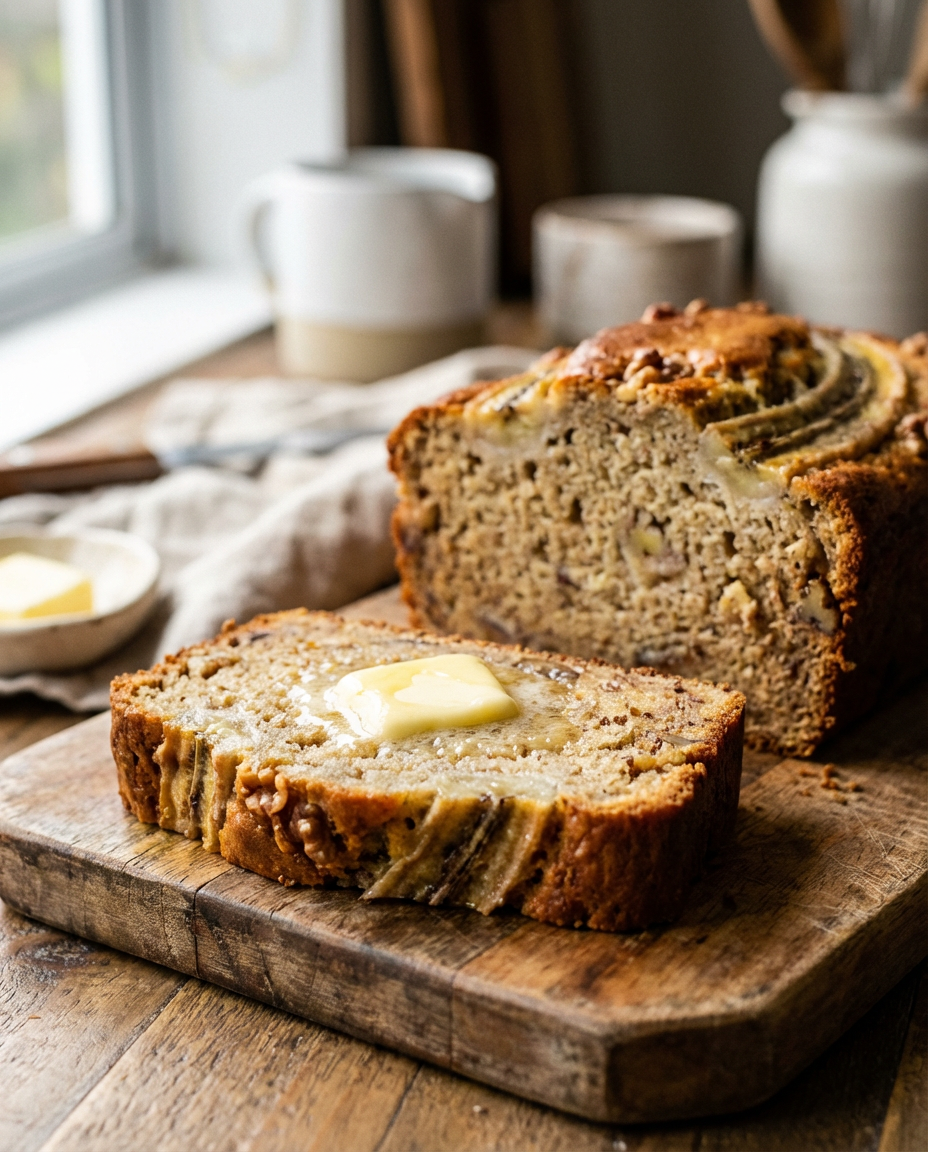
- Serve sliced with butter, or store in an airtight container at room temperature for up to 5 days.
Delicious Variations to Try
While the classic recipe is perfect as written, New Zealand home bakers have created wonderful variations over the years. Chocolate chip banana bread remains enduringly popular; simply fold three-quarters of a cup of dark or milk chocolate chips into the batter just before pouring it into the tin. The chocolate melts slightly during baking, creating pockets of gooey richness. For best results, roughly chop a good chocolate bar into irregular chunks for more interesting pockets of melted chocolate.
Nut lovers can transform this loaf by adding half a cup of chopped walnuts, pecans, or macadamias to the batter before baking. Toast the nuts lightly in a dry pan over medium heat for three to five minutes before chopping to intensify their flavor and add extra crunch. You can also combine chocolate chips and nuts for the ultimate loaded banana bread that satisfies multiple cravings in every delicious bite.
For those following a gluten-free diet, this recipe adapts beautifully. Replace the all-purpose flour with a quality gluten-free baking blend that contains xanthan gum in equal measure, cup for cup. The texture will be slightly different, perhaps a touch more tender and delicate, but the flavor remains authentic. You might need to reduce the baking time by five to ten minutes. Another popular variation involves adding a teaspoon of cinnamon and half a teaspoon of mixed spice to the dry ingredients for a warmly spiced version.
Storage and Reheating
Properly stored banana bread stays fresh and moist for up to five days at room temperature. Once completely cooled, wrap the loaf tightly in plastic wrap or aluminum foil, or store in an airtight container to prevent air exposure. Avoid refrigerating banana bread unless your kitchen is extremely warm or humid, as refrigeration can dry it out and alter the texture. Interestingly, the loaf actually tastes better on the second and third day as the flavors meld and develop complexity.
Freezing banana bread is brilliant for meal prep or preserving extra loaves. Wrap the cooled loaf tightly in plastic wrap, then again in aluminum foil for double protection against freezer burn. Properly wrapped banana bread freezes beautifully for up to three months without losing quality. You can freeze the whole loaf intact or slice it first and freeze individual portions, which is perfect for grabbing a quick breakfast straight from the freezer. To freeze slices separately, place parchment paper between each slice before wrapping.
For reheating, thaw frozen slices at room temperature for thirty minutes or microwave for twenty to thirty seconds on medium power until warm. Toast slices in a toaster or sandwich press for extra deliciousness; the edges crisp up beautifully while the inside stays soft and warm. Spread with salted butter while still hot and watch it melt into the bread. Some Kiwis enjoy their banana bread toasted with cream cheese or crunchy peanut butter for an elevated breakfast treat.
Frequently Asked Questions
Why is my banana bread dense?
Dense banana bread is usually caused by overmixing the batter or using too much flour. When you overmix, you develop too much gluten which makes the bread tough. Mix just until the ingredients are combined, and measure flour correctly using the spoon-and-level method rather than scooping directly from the bag.
Can I use unripe bananas for banana bread?
Ripe bananas with brown spots work best for banana bread as they’re sweeter and mash easily. Unripe green bananas lack the natural sweetness and moisture needed for the best results. If your bananas aren’t ripe enough, you can speed up ripening by placing them in a paper bag for 1-2 days.
How long does banana bread last?
Banana bread stays fresh at room temperature for 3-4 days when wrapped tightly in plastic wrap or stored in an airtight container. For longer storage, refrigerate for up to a week or freeze for up to 3 months. Thaw frozen banana bread overnight at room temperature.
Can you freeze banana bread?
Yes! Banana bread freezes beautifully. Wrap individual slices or the whole loaf tightly in plastic wrap, then aluminum foil. Freeze for up to 3 months. Thaw at room temperature for a few hours or microwave individual slices for 30-60 seconds.
How do I know when banana bread is done?
Insert a toothpick or skewer into the center of the loaf. If it comes out clean or with just a few moist crumbs (not wet batter), it’s done. The top should be golden brown and spring back when lightly pressed. Internal temperature should reach 200°F (95°C).
Why did my banana bread sink in the middle?
A sunken middle usually means the bread wasn’t fully baked, there was too much leavening agent, or the oven door was opened too early. Make sure to bake for the full time indicated, avoid opening the oven door before 45 minutes, and check your baking soda/powder isn’t expired.
Can I make banana bread without eggs?
Yes! You can substitute each egg with 1/4 cup unsweetened applesauce, 1/4 cup mashed banana (use extra ripe bananas), or 1 tablespoon ground flaxseed mixed with 3 tablespoons water (let sit 5 minutes). The texture will be slightly different but still delicious.
What makes banana bread moist?
The key to moist banana bread is using very ripe bananas (the darker the better), not overbaking, and the right ratio of wet to dry ingredients. Adding sour cream, yogurt, or an extra tablespoon of oil can also boost moisture. Don’t skip the butter or oil!
Can I substitute oil for butter in banana bread?
Yes, you can substitute melted butter with an equal amount of vegetable oil or coconut oil. Oil actually makes banana bread slightly more moist and tender. However, butter provides better flavor. For best results, use half butter and half oil.
How ripe should bananas be for banana bread?
The riper the better! Look for bananas with lots of brown spots or even completely brown/black peels. These overripe bananas are sweeter, more flavorful, and mash easily. If your bananas aren’t ripe enough, roast them in a 300°F oven for 15-20 minutes to speed up the process.
Watch How to Make New Zealand Banana Bread
Conclusion
This classic New Zealand banana bread recipe delivers everything you want from comfort baking: incredible moistness that lasts for days, deep banana flavor, and a tender crumb. By following the traditional Kiwi approach, using very ripe bananas, avoiding overmixing, and baking until perfectly golden, you’ll create a loaf that rivals anything from the best bakeries. The beauty of this recipe lies in its versatility; enjoy it plain, add chocolate chips or nuts, or toast slices for breakfast with butter melting into every bite. Whether you’re feeding hungry family members, contributing to a morning tea, or simply using up spotty bananas, this recipe never disappoints. So preheat that oven, grab those overripe bananas, and experience the simple magic of authentic New Zealand home baking.