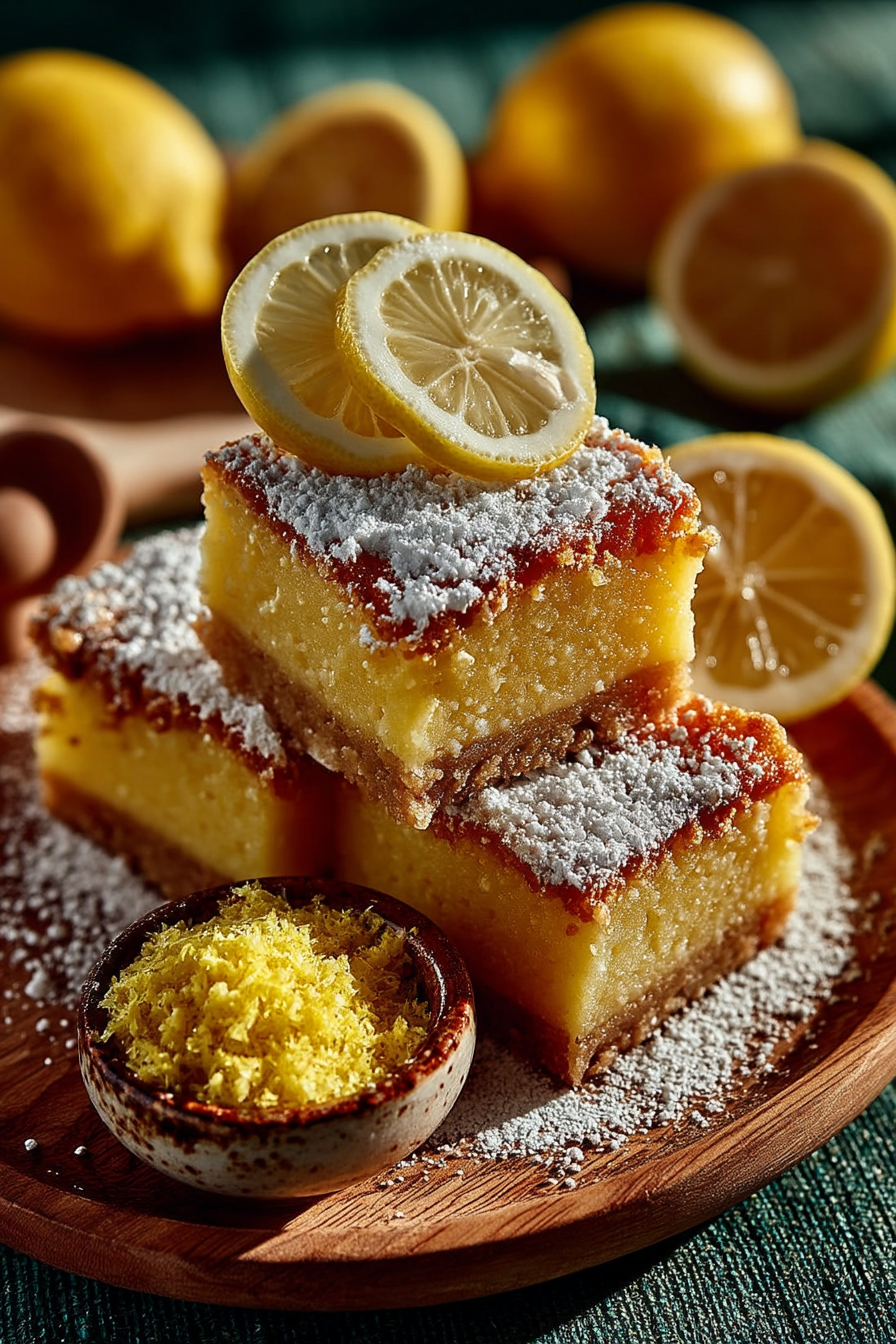
There’s something absolutely magical about biting into a homemade lemon bar—that perfect balance of buttery, crumbly shortbread base and tangy, creamy lemon filling is simply irresistible. If you’ve been intimidated by making your own easy lemon bars recipe at home, I’m here to tell you that it’s far easier than you think. In fact, this simple lemon bars recipe requires just a handful of pantry staples and about 45 minutes of your time, and you’ll have a dozen beautiful, bakery-quality bars that will impress everyone at your table.
I’ve tested this easy lemon bars recipe dozens of times, tweaking ratios and techniques to create what I believe is the most foolproof version out there. Whether you’re a seasoned baker or someone who rarely ventures into the kitchen, this no-fail lemon bars recipe will deliver perfect results every single time. The secret lies in understanding a few simple techniques that I’ll walk you through, plus a couple of personal tips I’ve picked up along the way.
The beauty of this homemade lemon bars recipe is its versatility. You can serve them at brunch, pack them in lunchboxes, gift them to neighbors, or simply enjoy them with an afternoon cup of tea. Let me share everything you need to know to create these stunning yellow treats that taste like they came straight from a professional bakery.
Why You’ll Love This Easy Lemon Bars Recipe
- Incredibly Easy to Make: This easy lemon bars recipe comes together in just two simple steps—mix the base, press it down, bake, then add the filling and bake again. No special skills required.
- No Special Equipment Needed: You only need a 9×13 inch baking pan and basic mixing bowls. No stand mixer, no fancy gadgets, just the essentials.
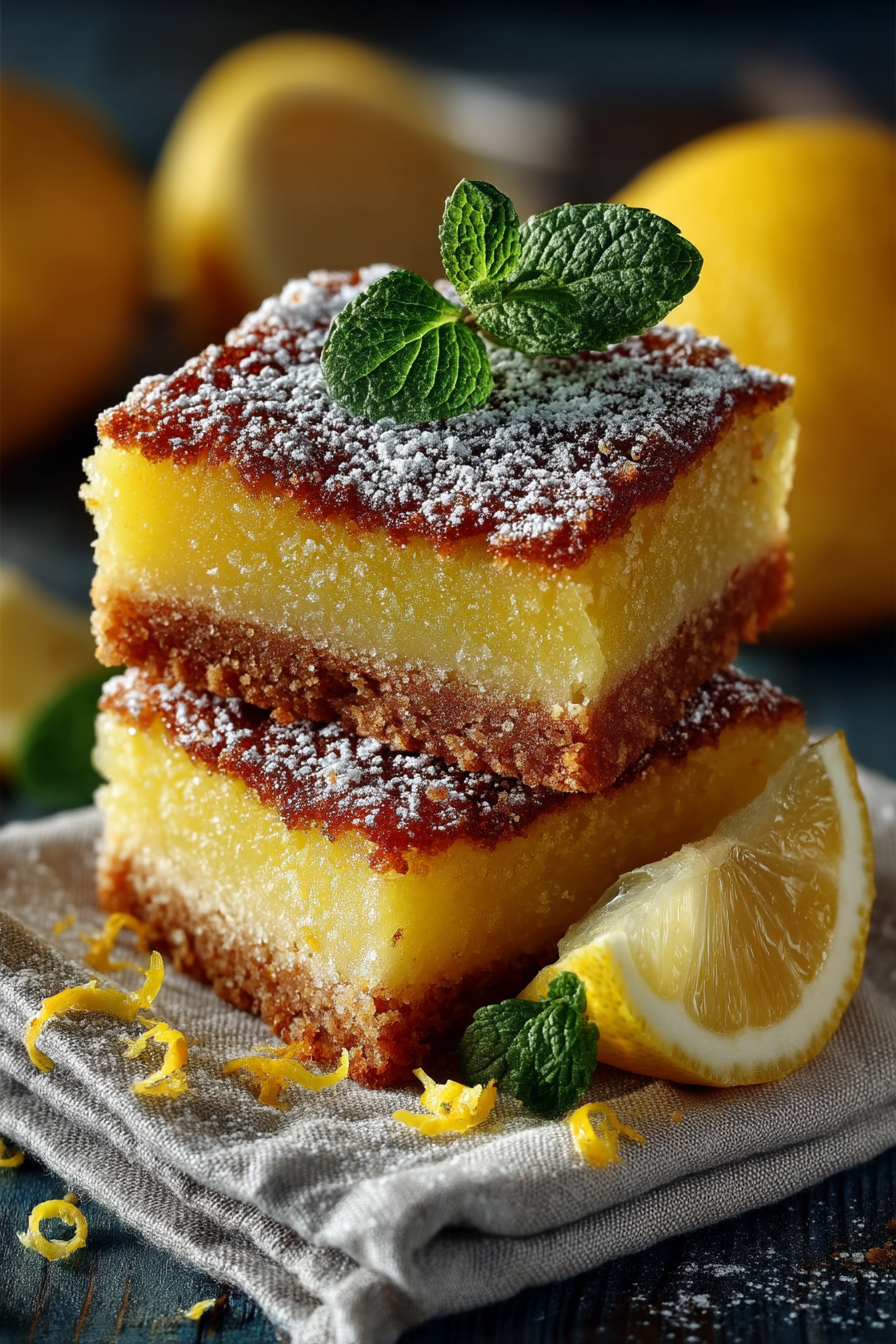
- Perfect Balance of Flavors: The buttery lemon bars have a crispy-chewy texture with bright, zesty lemon flavor that’s balanced perfectly—not too sour, not too sweet.
- Pantry Staple Ingredients: Everything you need for this quick lemon dessert is likely already in your kitchen: flour, butter, eggs, sugar, lemon juice, and powdered sugar.
- Make-Ahead Friendly: These simple lemon bars can be prepared up to 2 days in advance, making them perfect for meal prep or entertaining.
- Budget-Friendly: At just a few dollars for the entire batch, this lemon bar recipe easy is one of the most economical desserts you can make.
Ingredients You’ll Need
The magic of this best lemon bars recipe lies in using quality ingredients, even though the list is short. Fresh lemon juice makes all the difference—bottled just won’t give you that bright, vibrant flavor that makes these buttery lemon bars so special. For the base, I’m using all-purpose flour and real butter for that rich, tender shortbread texture that keeps people coming back for more.
Each ingredient plays a crucial role in the final result. The cornstarch in the filling helps set the custard-like texture, while the lemon zest intensifies the citrus flavor without adding liquid. Don’t skip the powdered sugar topping—it adds both visual appeal and a subtle sweetness that balances the tartness of the filling.
For the Shortbread Base
- 1 cup unsalted butter (softened to room temperature)
- 2 cups all-purpose flour (spooned and leveled)
- 1/2 cup granulated sugar (divided)
- 1/4 teaspoon sea salt (fine)
For the Lemon Filling
- 4 large eggs (room temperature)
- 1.5 cups granulated sugar (for filling)
- 1/4 cup all-purpose flour (for structure)
- 3 tablespoons cornstarch (prevents weeping)
- 1/2 cup fresh lemon juice (about 3-4 lemons, strained)
- 2 tablespoons fresh lemon zest (microplaned, no white pith)
- 1/4 teaspoon sea salt (balances flavor)
For Assembly
- 3 tablespoons powdered sugar (for dusting, plus more as needed)
Optional Add-ins:
- 1/2 teaspoon vanilla extract
- 1/4 teaspoon almond extract
- 1 teaspoon fresh mint leaves
How to Make Easy Lemon Bars Recipe (Step-by-Step)
1. Prepare Your Pan
Preheat your oven to 350°F (175°C). Line a 9×13 inch baking pan with parchment paper, allowing the edges to hang over the sides by about 2 inches. This makes removing the bars much easier and prevents sticking.
Pro tip: Using parchment paper is a game-changer for this easy lemon bars recipe—it prevents any sticking and creates clean, professional-looking edges.
2. Make the Shortbread Base
In a medium bowl, combine the softened butter, 2 cups flour, 1/2 cup granulated sugar, and 1/4 teaspoon salt. Mix with an electric mixer on low speed until the mixture resembles coarse breadcrumbs and just starts to come together.
Pro tip: Don’t overmix—you want a slightly crumbly texture that will hold together when pressed, not a uniform dough.
Press the mixture firmly and evenly into the prepared baking pan, using the bottom of a measuring cup to create a smooth, compact layer. This is your base for the best lemon bars recipe.
Pro tip: Make sure the base is pressed all the way into the corners and edges for uniform baking. A thin, even base ensures crispy texture throughout.
Bake the base for 12-15 minutes until light golden brown and set. You want it just barely cooked at this stage—it will firm up further when the filling is added.
Pro tip: Don’t skip this pre-baking step. It ensures your simple lemon bars won’t have a soggy bottom.
3. Prepare the Lemon Filling
While the base bakes, combine eggs, 1.5 cups sugar, 1/4 cup flour, cornstarch, lemon juice, lemon zest, and 1/4 teaspoon salt in a large bowl.
Pro tip: Strain your fresh lemon juice through a fine mesh to remove any pulp—this creates a smoother filling in your homemade lemon bars.
Whisk the filling mixture by hand or with an electric mixer on medium speed for about 1-2 minutes until well combined and slightly frothy. The filling should be smooth and unified in color.
Pro tip: Don’t overbeat the filling—you don’t want to incorporate too much air, which can cause cracks on top. Just mix until combined.
4. Assemble and Bake
Remove the pre-baked base from the oven and immediately pour the lemon filling over it, spreading evenly with a spatula. The hot base will help set the bottom of your lemon bar recipe easy.
Pro tip: Work quickly but carefully to spread the filling evenly. If you have any air bubbles, tap the pan gently on the counter to release them.
Return the pan to the oven and bake for 20-25 minutes. The filling should be set around the edges but still have a very slight jiggle in the center (about 2 inches in diameter). This is the sweet spot for no-fail lemon bars—it means they’ll set up perfectly as they cool.
Pro tip: This is the most important step for perfect buttery lemon bars. Overbaking results in a rubbery filling; underbaking leaves it too custardy. Start checking at 20 minutes.
5. Cool and Chill
Remove from the oven and let cool to room temperature on a wire rack, about 1 hour. The bars will continue to set as they cool.
Pro tip: This cooling step is crucial for setting the filling properly. Don’t skip it or refrigerate too early.
Once cooled, refrigerate for at least 2 hours, or preferably overnight. This ensures the bars are completely set and will cut cleanly into squares.
Pro tip: Cold bars are much easier to cut cleanly. Use a sharp knife dipped in hot water and wiped dry between cuts for perfect edges on your quick lemon dessert.
6. Cut and Dust
Remove from the refrigerator and use the parchment paper overhang to lift the entire block out of the pan onto a cutting board. Using a sharp knife, cut into 12-16 squares depending on desired size.
Pro tip: A hot knife makes the cleanest cuts. Dip a sharp chef’s knife in hot water, wipe it dry, cut one bar, then repeat. This prevents the filling from smudging.
Dust each bar generously with powdered sugar using a fine mesh strainer. For extra pizzazz, add a second dusting just before serving. This finishing touch completes your easy lemon bars recipe.
Pro tip: The powdered sugar not only looks beautiful but adds a subtle sweetness that balances the tartness of the lemon.
Easy Lemon Bars Recipe – Full Recipe
Easy Lemon Bars Recipe
Ingredients
Equipment
Method
- Preheat your oven to 350°F (175°C). Line a 9x13 inch baking pan with parchment paper, allowing the edges to hang over the sides by about 2 inches. This makes removing the bars much easier and prevents sticking. Pro tip: Using parchment paper is a game-changer for this easy lemon bars recipe—it prevents any sticking and creates clean, professional-looking edges.
- In a medium bowl, combine the softened butter, 2 cups flour, 1/2 cup granulated sugar, and 1/4 teaspoon salt. Mix with an electric mixer on low speed until the mixture resembles coarse breadcrumbs and just starts to come together. Pro tip: Don't overmix—you want a slightly crumbly texture that will hold together when pressed, not a uniform dough.
- Press the mixture firmly and evenly into the prepared baking pan, using the bottom of a measuring cup to create a smooth, compact layer. This is your base for the best lemon bars recipe. Pro tip: Make sure the base is pressed all the way into the corners and edges for uniform baking. A thin, even base ensures crispy texture throughout.
- Bake the base for 12-15 minutes until light golden brown and set. You want it just barely cooked at this stage—it will firm up further when the filling is added. Pro tip: Don't skip this pre-baking step. It ensures your simple lemon bars won't have a soggy bottom.
- While the base bakes, combine eggs, 1.5 cups sugar, 1/4 cup flour, cornstarch, lemon juice, lemon zest, and 1/4 teaspoon salt in a large bowl. Pro tip: Strain your fresh lemon juice through a fine mesh to remove any pulp—this creates a smoother filling in your homemade lemon bars.
- Whisk the filling mixture by hand or with an electric mixer on medium speed for about 1-2 minutes until well combined and slightly frothy. The filling should be smooth and unified in color. Pro tip: Don't overbeat the filling—you don't want to incorporate too much air, which can cause cracks on top. Just mix until combined.
- Remove the pre-baked base from the oven and immediately pour the lemon filling over it, spreading evenly with a spatula. The hot base will help set the bottom of your lemon bar recipe easy. Pro tip: Work quickly but carefully to spread the filling evenly. If you have any air bubbles, tap the pan gently on the counter to release them.
- Return the pan to the oven and bake for 20-25 minutes. The filling should be set around the edges but still have a very slight jiggle in the center (about 2 inches in diameter). This is the sweet spot for no-fail lemon bars—it means they'll set up perfectly as they cool. Pro tip: This is the most important step for perfect buttery lemon bars. Overbaking results in a rubbery filling; underbaking leaves it too custardy. Start checking at 20 minutes.
- Remove from the oven and let cool to room temperature on a wire rack, about 1 hour. The bars will continue to set as they cool. Pro tip: This cooling step is crucial for setting the filling properly. Don't skip it or refrigerate too early.
- Once cooled, refrigerate for at least 2 hours, or preferably overnight. This ensures the bars are completely set and will cut cleanly into squares. Pro tip: Cold bars are much easier to cut cleanly. Use a sharp knife dipped in hot water and wiped dry between cuts for perfect edges on your quick lemon dessert.
- Remove from the refrigerator and use the parchment paper overhang to lift the entire block out of the pan onto a cutting board. Using a sharp knife, cut into 12-16 squares depending on desired size. Pro tip: A hot knife makes the cleanest cuts. Dip a sharp chef's knife in hot water, wipe it dry, cut one bar, then repeat. This prevents the filling from smudging.
- Dust each bar generously with powdered sugar using a fine mesh strainer. For extra pizzazz, add a second dusting just before serving. This finishing touch completes your easy lemon bars recipe. Pro tip: The powdered sugar not only looks beautiful but adds a subtle sweetness that balances the tartness of the lemon.
Notes
- Fresh lemon juice is essential—avoid bottled concentrate for best flavor
- The slight jiggle in the center indicates perfectly baked bars; they'll set as they cool
- Pre-baking the base prevents a soggy bottom and ensures a crispy texture
Tips for the Best Easy Lemon Bars Recipe
- Room Temperature Ingredients: Make sure your eggs and butter are at room temperature. Cold ingredients don’t mix as smoothly, which can affect the texture of your easy lemon bars recipe.
- Fresh Lemon Juice Matters: Never use bottled lemon juice concentrate for this homemade lemon bars recipe. Fresh juice provides bright flavor and better results. One medium lemon yields about 2-3 tablespoons of juice.
- Don’t Skip the Pre-Bake: This crucial step ensures a crispy base instead of a soggy bottom. It’s what makes this best lemon bars recipe truly no-fail.
- Perfect Bake Time: The slight jiggle in the center is your visual cue that the bars are perfectly baked. A toothpick inserted in the center should come out mostly clean with just a tiny bit of residue.
- Sharp Cuts Equal Professional Results: Invest in a quality serrated knife and keep it hot. This prevents the filling from dragging and ensures your simple lemon bars look bakery-quality.
- Storage is Key: Keep these bars refrigerated in an airtight container. They actually taste better the next day as flavors meld and the texture becomes more uniform.
Variations to Try
- Raspberry Lemon Bars: Add 1 cup fresh raspberries between the base and filling, or swirl in 1/2 cup raspberry preserves. The tartness of raspberries complements lemon perfectly in this easy lemon bars recipe variation.
- Glazed Lemon Bars: Skip the powdered sugar topping and make a quick glaze with 2 cups powdered sugar mixed with 3-4 tablespoons lemon juice. Drizzle over cooled bars for an elegant finish to your best lemon bars recipe.
- Coconut Lemon Bars: Add 1 cup shredded unsweetened coconut to the filling and sprinkle 1/2 cup toasted coconut on top after dusting with powdered sugar. This variation pairs beautifully with the bright citrus flavor.
- Lavender Lemon Bars: Stir 1/2 teaspoon dried culinary lavender into the filling for a sophisticated twist on the classic simple lemon bars. The floral notes elevate this quick lemon dessert.
- Extra Thick Bars: Use an 8×8 inch pan instead of 9×13 for thicker, chewier bars with more filling-to-base ratio. This variation is perfect for those who love a generous lemon filling.
Storage and Meal Prep Tips
- Refrigerator: Store covered in an airtight container for up to 5 days. The bars actually taste better on day 2 or 3 as flavors meld. Keep them cold to prevent the filling from becoming too soft.
- Freezer: These easy lemon bars freeze beautifully for up to 3 months. Wrap individual bars in plastic wrap, then place in a freezer bag. Thaw in the refrigerator for 2-3 hours before serving.
- Room Temperature: If serving at room temperature (not recommended as they may become too soft), do so within 2 hours of removal from refrigerator. For parties, keep them chilled and remove just before serving.
- Make-Ahead Tip: You can prepare the base up to 1 day ahead, cover it tightly, and refrigerate. Add the lemon filling and bake when ready. This makes your homemade lemon bars recipe perfect for meal prep.
Nutritional Benefits
These buttery lemon bars provide a delicious indulgence that also offers some nutritional benefits, particularly from the fresh lemon juice which is rich in vitamin C and antioxidants. While these simple lemon bars are definitely a treat, the eggs provide quality protein and choline for brain health, and the lemon juice supports immune function and aids in calcium absorption. One bar provides a satisfying portion that satisfies sweet cravings without being excessively heavy.
- Vitamin C: Fresh lemon juice provides immune-boosting vitamin C, supporting collagen production and antioxidant defense
- Protein: Eggs contribute quality protein for satiety and muscle maintenance
- Calcium: Dairy butter contains calcium for bone health and development
- Antioxidants: Lemon contains flavonoids and other compounds that protect cells from oxidative stress
What to Serve With Easy Lemon Bars Recipe
- Afternoon Tea or Coffee: The tartness of lemon bars perfectly complements a hot cup of Earl Grey tea or fresh-brewed coffee. This is the classic pairing for this easy lemon bars recipe.
- Lemon Verbena Tea: Enhance the lemon flavor experience by serving with herbal lemon verbena tea. The herbaceous notes echo the citrus in your homemade lemon bars.
- Vanilla Ice Cream: Serve warm bars with a scoop of vanilla ice cream for the ultimate dessert. The cold creaminess melts into the tart filling beautifully.
- Greek Yogurt Parfait: Layer crumbled lemon bars with Greek yogurt and fresh berries for a delightful brunch or light dessert. This transforms your simple lemon bars into a more substantial treat.
- Sparkling Lemonade: Serve alongside homemade sparkling lemonade for a refreshing, citrus-forward combination that’s perfect for summer entertaining with this no-fail lemon bars recipe.
Frequently Asked Questions
Why did my lemon bars come out too sour?
The filling may have too much lemon juice or was overbaked. Try using 1/4 cup lemon juice instead of 1/2 cup if you prefer less tang. Also ensure you’re not baking beyond 25 minutes, as this can intensify the sour flavor. Some people prefer slightly less zest as well—start with 1.5 tablespoons instead of 2.
Can I use bottled lemon juice for this easy lemon bars recipe?
While it’s possible, it’s not recommended for best results. Bottled lemon juice often has a metallic aftertaste and lacks the bright, fresh flavor of freshly squeezed juice. Fresh lemon juice is inexpensive and makes a significant difference in the final taste of your best lemon bars recipe.
How do I prevent cracks on top of my lemon bars?
Cracks typically indicate overbaking or temperature fluctuations. Avoid opening the oven door during baking, and ensure your oven temperature is accurate with an oven thermometer. Also, don’t overmix the filling, which incorporates excess air that can cause cracking. A slight jiggle in the center is your target.
Why is my lemon bar filling weeping or separating?
Weeping usually means the bars were overbaked or not cooled and refrigerated long enough. The cornstarch is specifically included to prevent this issue. Make sure to follow the cooling timeline: room temperature for 1 hour, then refrigerate for at least 2 hours before cutting.
Can I make this recipe without cornstarch in my easy lemon bars?
Cornstarch is crucial for preventing weeping and setting the filling properly. If you absolutely can’t use it, you can substitute with an equal amount of arrowroot powder or increase the flour to 1/3 cup, but results may not be as perfect. The cornstarch is what makes this a no-fail lemon bars recipe.
Final Thoughts
There you have it—everything you need to create restaurant-quality lemon bars right in your own kitchen. This easy lemon bars recipe has become a staple in my home because it’s so reliable, impressive, and utterly delicious. The combination of a buttery, crumbly shortbread base with a silky, tart lemon filling is pure bliss, and the fact that it comes together so quickly makes it perfect for any occasion, from casual gatherings to elegant entertaining.
I hope you’ll make this homemade lemon bars recipe soon and discover why so many readers have told me it’s become their go-to dessert. The best part? Once you’ve mastered this simple lemon bars recipe, you’ll feel confident enough to experiment with the variations I’ve shared. Either way, you’re going to create something truly special that will have everyone asking for the recipe.
Ready to Try It?
Ready to make the best lemon bars you’ve ever tasted? Gather your ingredients, preheat that oven, and prepare to impress yourself with how easy this no-fail lemon bars recipe truly is. I’d absolutely love to hear about your experience—drop a comment below and let me know how your bars turned out, or share any creative variations you try. Don’t forget to snap a photo and tag us on Instagram @AppetizingIdeas using #EasyLemonBarsRecipe. Happy baking!