If you’re looking for a quick, satisfying lunch that doesn’t compromise on flavor, this chicken caesar wrap is about to become your new go-to meal. I’ve been making these for years, and they never disappoint—whether I’m meal prepping for the week or throwing together a last-minute dinner. The beauty of a chicken caesar wrap is its simplicity combined with that irresistible creamy caesar flavor that makes you feel like you’re eating something indulgent, even though it’s genuinely nutritious.
What I love most about this easy chicken wrap recipe is how customizable it is. You can use rotisserie chicken for a truly hands-off approach, grill your own chicken breasts for that smoky flavor, or even use leftover roasted chicken from last night’s dinner. The homemade caesar dressing takes just five minutes to whip up, and honestly, once you make it fresh, you’ll never go back to the bottled version. This is the kind of recipe that works for busy weeknights, meal prep Sundays, or impressing lunch guests.
In this complete guide, I’m sharing my insider tips for building the perfect caesar chicken wraps, including how to prevent soggy wraps, which lettuce works best, and creative variations that keep things interesting. Let’s dive in!
Why You’ll Love This Chicken Caesar Wrap Recipe
- Quick Assembly: Total time under 20 minutes means you can have lunch ready faster than a drive-thru visit
- Protein-Packed: Grilled chicken provides lean protein that keeps you satisfied throughout the afternoon without the energy crash
- Customizable Base: Use your preferred wrap—flour, whole wheat, spinach, or even low-carb alternatives depending on your dietary needs
- Make-Ahead Friendly: Components prep beautifully in advance, making this ideal for meal prep and lunch boxes
- Restaurant-Quality Taste: Homemade caesar dressing elevates this from basic sandwich to something truly crave-worthy
- Budget-Conscious: This costs significantly less than grabbing wraps from a cafe, especially when buying rotisserie chicken on sale
Ingredients You’ll Need
The magic of a great chicken caesar wrap lies in quality ingredients and, most importantly, fresh caesar dressing. I’m giving you two options here: a traditional creamy version and a lighter Greek yogurt variation that cuts calories without sacrificing that savory, garlicky goodness. The chicken can be prepped however works best for your schedule—grilled, rotisserie, or even shredded from a can in a pinch.
What makes this easy chicken wrap recipe truly special is using fresh romaine lettuce rather than pre-shredded varieties, which get watery and sad by lunchtime. I also recommend warm or room-temperature chicken rather than cold, as it helps the flavors meld better and makes the wrap more enjoyable to eat. Pay attention to wrap quality too—thicker tortillas or wraps hold up better to the moisture from the lettuce and dressing.
For the Homemade Caesar Dressing
- 1 cup Greek yogurt or mayonnaise (use half and half for lighter version)
- 3 tablespoons fresh lemon juice (freshly squeezed is best)
- 2 tablespoons grated Parmesan cheese (use quality aged Parm)
- 4 cloves garlic, minced (or 1 teaspoon garlic powder if pressed for time)
- 1 tablespoon Dijon mustard (adds depth and emulsifies the dressing)
- 1 teaspoon Worcestershire sauce (essential for authentic flavor)
- 1/2 teaspoon anchovy paste (optional but traditional; omit for vegetarian version)
- Salt and black pepper to taste seasoning (adjust at the end)
For the Wraps
- 1 pound chicken breast (or 2 cups shredded rotisserie chicken)
- 1 tablespoon olive oil (for grilling chicken)
- 1/2 teaspoon salt (for seasoning chicken)
- 1/4 teaspoon black pepper (freshly ground)
- 1/2 teaspoon garlic powder (optional chicken seasoning)
- 4 large flour tortillas or wraps (10-inch size works best)
- 3 cups fresh romaine lettuce, chopped (bite-sized pieces)
- 1/2 cup Parmesan cheese shavings (use a vegetable peeler for best presentation)
- 1/2 cup cherry tomatoes, halved (optional but recommended)
Optional Add-ins:
- croutons, homemade or store-bought
- bacon bits or crispy pancetta
- red onion, thinly sliced
- avocado or avocado mayonnaise
- sun-dried tomatoes
How to Make Chicken Caesar Wrap Recipe (Step-by-Step)
1. Make the Homemade Caesar Dressing
In a medium mixing bowl, combine the Greek yogurt (or mayo), minced fresh garlic, grated Parmesan, Dijon mustard, Worcestershire sauce, and anchovy paste if using. Whisk until smooth and well combined.
Pro tip: If using garlic powder instead of fresh garlic, reduce to 1/2 teaspoon as it’s more concentrated
Add the fresh lemon juice and whisk again until you reach your desired consistency. If the dressing seems too thick, thin it with a tablespoon or two of water or milk.
Pro tip: Make the dressing at least 30 minutes ahead so flavors can meld—it tastes even better the next day
Season generously with salt and freshly ground black pepper. Taste and adjust seasonings as needed.
Pro tip: Remember you’ll be adding salty Parmesan shavings and potentially bacon, so don’t over-salt at this stage
2. Prepare the Chicken
If using fresh chicken breast, pat it dry with paper towels. Season both sides generously with salt, black pepper, and garlic powder if desired.
Pro tip: Pat the chicken completely dry before grilling—moisture prevents proper browning and creates steam instead of that beautiful crust
Heat olive oil in a grill pan or skillet over medium-high heat until shimmering. Place the seasoned chicken breast in the pan and cook for 6-7 minutes without moving it.
Pro tip: Resist the urge to flip! Let it develop a golden crust before turning
Flip and cook for another 6-7 minutes until cooked through (internal temperature of 165°F). Let rest for 5 minutes, then slice or cut into bite-sized pieces.
Pro tip: Resting the chicken is crucial—it keeps the meat juicy rather than dried out. If using rotisserie chicken, you can skip straight to slicing
3. Prepare the Vegetables
Wash and thoroughly dry your romaine lettuce. Using paper towels or a salad spinner, remove as much moisture as possible to prevent soggy wraps.
Pro tip: This step is absolutely non-negotiable for a successful wrap. Wet lettuce will make your tortilla soggy within minutes
Chop the romaine into bite-sized pieces—roughly 1-2 inches. Cut your cherry tomatoes in half and have any other fresh ingredients ready to assemble.
Pro tip: Prep your vegetables right before assembly rather than far in advance for maximum freshness and crispness
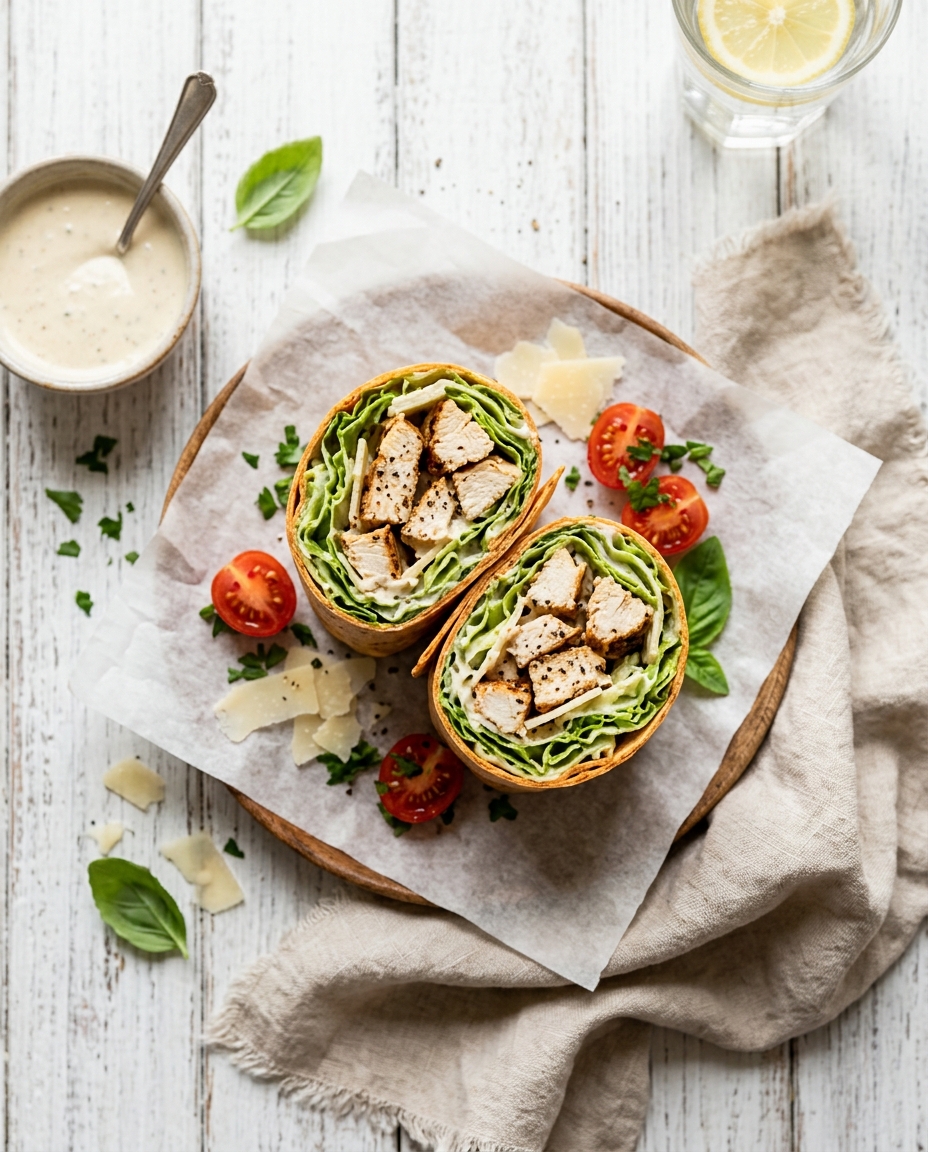
4. Assemble Your Chicken Caesar Wraps
Lay out one tortilla or wrap on a clean, flat surface. Spread about 3-4 tablespoons of caesar dressing evenly across the tortilla, leaving a 1-inch border on all sides.
Pro tip: Don’t skimp on the dressing—it’s what makes this special—but don’t overdo it or it will leak out the sides
Layer about 3/4 cup of chopped romaine lettuce down the center, leaving space at the top and bottom. Top with your sliced or shredded chicken, then add cherry tomatoes if using.
Pro tip: Keep ingredients in a vertical line down the center—this makes rolling much easier
Add a generous handful of Parmesan shavings and any optional ingredients like bacon or croutons (add croutons just before eating for crunch).
Pro tip: Use a vegetable peeler to create thin Parmesan shavings rather than grated cheese, which doesn’t have the same elegant texture
Fold the bottom of the tortilla up over the filling, then fold in both sides, and finally roll tightly away from you until completely wrapped. The seam should be on the bottom.
Pro tip: Roll snugly but not so tight that you tear the tortilla. Practice makes perfect here
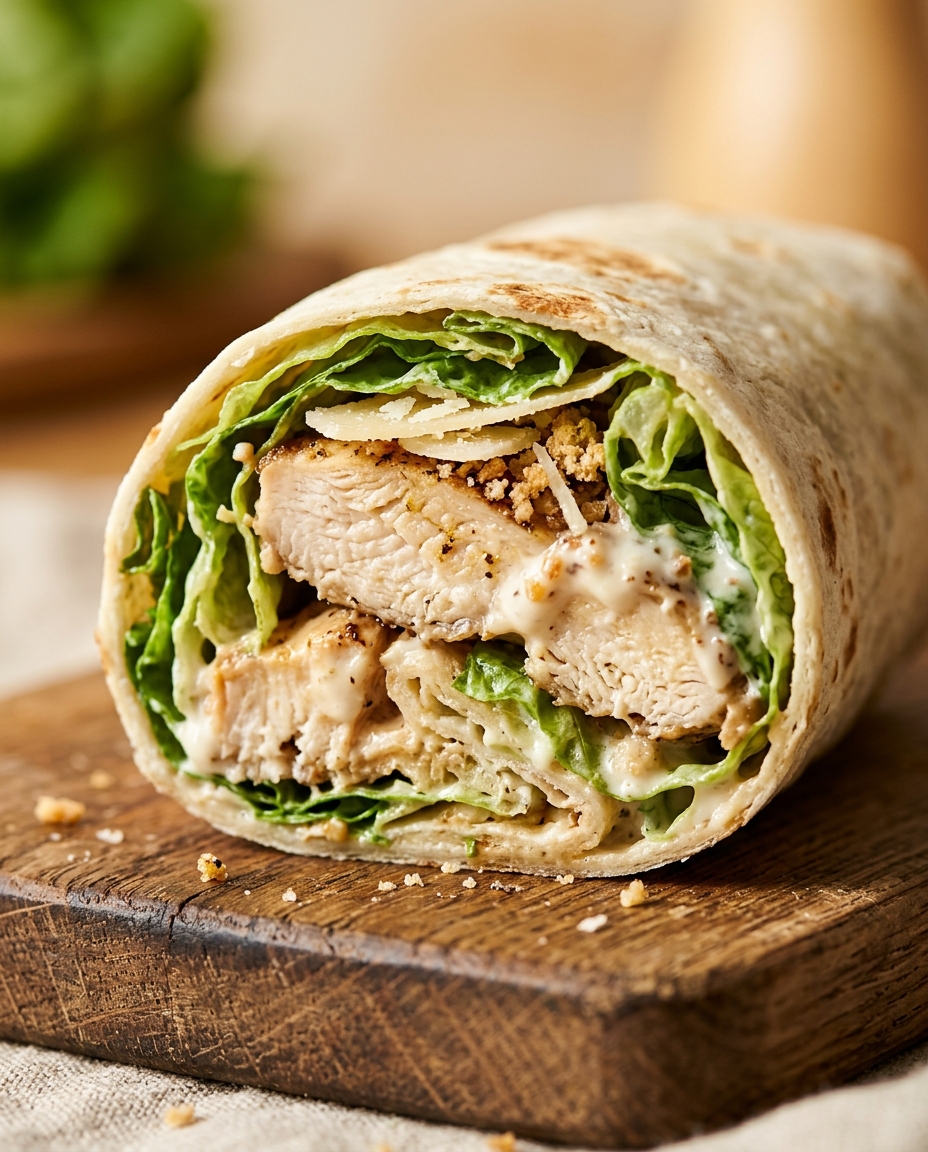
If eating immediately, cut the wrap in half diagonally for easier eating. If packing for later, wrap in parchment paper and refrigerate until ready to eat.
Pro tip: Cut just before eating rather than ahead of time to prevent the wrap from unwinding
Chicken Caesar Wrap Recipe – Full Recipe
Chicken Caesar Wrap Recipe
Ingredients
Equipment
Method
- In a medium mixing bowl, combine the Greek yogurt (or mayo), minced fresh garlic, grated Parmesan, Dijon mustard, Worcestershire sauce, and anchovy paste if using. Whisk until smooth and well combined. Pro tip: If using garlic powder instead of fresh garlic, reduce to 1/2 teaspoon as it's more concentrated
- Add the fresh lemon juice and whisk again until you reach your desired consistency. If the dressing seems too thick, thin it with a tablespoon or two of water or milk. Pro tip: Make the dressing at least 30 minutes ahead so flavors can meld—it tastes even better the next day
- Season generously with salt and freshly ground black pepper. Taste and adjust seasonings as needed. Pro tip: Remember you'll be adding salty Parmesan shavings and potentially bacon, so don't over-salt at this stage
- If using fresh chicken breast, pat it dry with paper towels. Season both sides generously with salt, black pepper, and garlic powder if desired. Pro tip: Pat the chicken completely dry before grilling—moisture prevents proper browning and creates steam instead of that beautiful crust
- Heat olive oil in a grill pan or skillet over medium-high heat until shimmering. Place the seasoned chicken breast in the pan and cook for 6-7 minutes without moving it. Pro tip: Resist the urge to flip! Let it develop a golden crust before turning
- Flip and cook for another 6-7 minutes until cooked through (internal temperature of 165°F). Let rest for 5 minutes, then slice or cut into bite-sized pieces. Pro tip: Resting the chicken is crucial—it keeps the meat juicy rather than dried out. If using rotisserie chicken, you can skip straight to slicing
- Wash and thoroughly dry your romaine lettuce. Using paper towels or a salad spinner, remove as much moisture as possible to prevent soggy wraps. Pro tip: This step is absolutely non-negotiable for a successful wrap. Wet lettuce will make your tortilla soggy within minutes
- Chop the romaine into bite-sized pieces—roughly 1-2 inches. Cut your cherry tomatoes in half and have any other fresh ingredients ready to assemble. Pro tip: Prep your vegetables right before assembly rather than far in advance for maximum freshness and crispness
- Lay out one tortilla or wrap on a clean, flat surface. Spread about 3-4 tablespoons of caesar dressing evenly across the tortilla, leaving a 1-inch border on all sides. Pro tip: Don't skimp on the dressing—it's what makes this special—but don't overdo it or it will leak out the sides
- Layer about 3/4 cup of chopped romaine lettuce down the center, leaving space at the top and bottom. Top with your sliced or shredded chicken, then add cherry tomatoes if using. Pro tip: Keep ingredients in a vertical line down the center—this makes rolling much easier
- Add a generous handful of Parmesan shavings and any optional ingredients like bacon or croutons (add croutons just before eating for crunch). Pro tip: Use a vegetable peeler to create thin Parmesan shavings rather than grated cheese, which doesn't have the same elegant texture
- Fold the bottom of the tortilla up over the filling, then fold in both sides, and finally roll tightly away from you until completely wrapped. The seam should be on the bottom. Pro tip: Roll snugly but not so tight that you tear the tortilla. Practice makes perfect here
- If eating immediately, cut the wrap in half diagonally for easier eating. If packing for later, wrap in parchment paper and refrigerate until ready to eat. Pro tip: Cut just before eating rather than ahead of time to prevent the wrap from unwinding
Notes
- Pat lettuce completely dry after washing to prevent soggy wraps—use a salad spinner or paper towels
- Make caesar dressing at least 30 minutes ahead so flavors meld together beautifully
- Assemble wraps close to eating time and keep dressing separate if packing for later transport
Tips for the Best Chicken Caesar Wrap Recipe
- Prevent Soggy Wraps: This is the number one complaint with wraps. The secret is thoroughly drying your lettuce and not assembling too far in advance. If you’re packing for lunch, keep the dressing separate until just before eating, or use a lettuce barrier between the dressing and tortilla
- Temperature Matters: Warm or room-temperature chicken blends better with the dressing and makes a more satisfying wrap than cold chicken. If using rotisserie chicken, you can warm it gently in a skillet for 2-3 minutes
- Wrap Selection: Thicker, heartier wraps and tortillas hold up better to moisture than thin ones. I prefer large flour tortillas or specialty wraps like spinach or sun-dried tomato varieties. Avoid thin corn tortillas which tend to tear
- Make-Ahead Magic: Prepare the dressing, grill the chicken, and wash/dry the lettuce the night before. In the morning, assembly takes just 10 minutes. This is perfect for meal prep if you’re making multiple wraps
- Dressing Consistency: If your dressing is too thick to spread easily, thin it with a tablespoon of water or milk at a time. If too thin, add more Parmesan or a teaspoon of mayo. The consistency should be spreadable but not runny
- Parmesan Quality: Use real aged Parmesan cheese (Parmigiano-Reggiano), not the pre-grated stuff in a can. The flavor difference is dramatic and worth the extra couple of dollars
Variations to Try
- Mediterranean Caesar Wrap: Add sliced cucumbers, kalamata olives, feta cheese, and sun-dried tomatoes. Use a lemon-herb vinaigrette instead of traditional caesar dressing for a lighter option
- Crispy Bacon Caesar Wrap: Layer 2-3 strips of crispy bacon in each wrap along with the standard ingredients. Add a drizzle of ranch dressing mixed with the caesar for extra depth
- Caprese Caesar Wrap: Combine the best of both worlds with fresh mozzarella, ripe tomatoes, fresh basil, and a balsamic glaze drizzle alongside the caesar dressing
- Spicy Chipotle Caesar Wrap: Mix 1-2 teaspoons of chipotle powder into the caesar dressing and add sliced jalapeños, red onion, and a squeeze of lime juice for a Southwestern twist
- Vegetarian Caesar Wrap: Replace the chicken with roasted chickpeas seasoned with garlic powder and paprika, or use marinated tofu cubes for plant-based protein
Storage and Meal Prep Tips
- Refrigerator Storage: Assembled wraps keep for up to 2 days when wrapped tightly in parchment paper or foil and stored in an airtight container. However, they’re best eaten within 24 hours before the tortilla absorbs too much moisture from the filling
- Meal Prep Strategy: Rather than assembling ahead, store components separately: dressing in an airtight container (up to 5 days), cooked chicken in a sealed container (up to 4 days), and washed/dried lettuce in a paper towel-lined container (up to 3 days). Assemble fresh each morning
- Freezing Caesar Dressing: Homemade caesar dressing freezes well for up to 3 months in an ice cube tray. Pop out cubes and thaw overnight in the refrigerator when needed. This is great for meal prep enthusiasts
- Transporting Wraps: Pack assembled wraps in an insulated lunch box with an ice pack. They’ll stay cool for up to 4 hours. Keep any additional dressing in a small container on the side to add just before eating
- Leftover Chicken: Any leftover grilled or rotisserie chicken keeps in the refrigerator for up to 4 days and can be used in other meals like salads, quesadillas, or grain bowls
Nutritional Benefits
This healthy chicken wrap delivers impressive nutritional value without sacrificing taste. The lean protein from the chicken keeps you satisfied for hours, while the fresh romaine lettuce provides vitamins, minerals, and fiber. The homemade caesar dressing, especially when made with Greek yogurt, offers probiotics and extra protein compared to store-bought versions. When made with the Greek yogurt option, you’re looking at a balanced meal with roughly 35g of protein, making it perfect for post-workout recovery or sustained energy throughout your afternoon.
- High in Lean Protein: The chicken provides essential amino acids for muscle repair and satiety
- Rich in Calcium and Vitamin K: From both the romaine lettuce and Parmesan cheese, supporting bone health
- Good Source of Probiotics: When using Greek yogurt in the dressing, you’re adding beneficial gut bacteria
- Low in Carbohydrates: Especially if using a low-carb tortilla option, making it suitable for various dietary approaches
- Contains Healthy Fats: From the Parmesan and olive oil, supporting nutrient absorption and satiety
- Rich in Antioxidants: From the fresh lettuce, tomatoes, and garlic
What to Serve With Chicken Caesar Wrap Recipe
- Crispy Baked Potato Wedges: Season with garlic powder, paprika, and rosemary. The crispy texture contrasts beautifully with the creamy wrap
- Garden Salad with Lemon Vinaigrette: A lighter side that won’t make you feel overstuffed while complementing the caesar flavors
- Homemade Tortilla Chips with Guacamole: Perfect for dipping alongside your wrap, adding healthy fats and a different texture
- Sparkling Lemon Water or Iced Tea: A refreshing beverage that cuts through the richness of the creamy dressing without overwhelming the dish
- Fresh Fruit Salad: Pineapple, berries, and citrus provide bright, clean flavors that refresh the palate after the savory wrap
Frequently Asked Questions
Can I make a chicken caesar wrap ahead of time for meal prep?
Absolutely! However, for the best results, I recommend assembling wraps the morning you plan to eat them rather than days ahead. Instead, prep components separately: make the caesar dressing up to 5 days ahead, grill and refrigerate chicken for 4 days, and wash/dry lettuce in a paper towel-lined container for 3 days. Assemble fresh each morning to avoid soggy wraps. If you must assemble ahead, keep the dressing separate and add it just before eating.
What’s the best way to prevent my chicken caesar wrap from getting soggy?
The key is thoroughly drying your lettuce after washing—use paper towels or a salad spinner to remove all excess moisture. Assemble your wrap as close to eating time as possible. If meal prepping, keep the dressing in a separate small container and add it just before eating, not hours ahead. You can also create a barrier by laying lettuce against the tortilla first, then adding dressing on top of the lettuce rather than directly on the wrap.
Can I use a rotisserie chicken from the grocery store for this recipe?
Yes! Rotisserie chicken is actually my go-to shortcut for this recipe. It saves you 20 minutes of cooking time and tastes delicious. Simply remove the meat from the bones, shred or chop it, and use about 2 cups per wrap recipe. You can use it cold or warm it gently in a skillet for 2-3 minutes to enhance the flavor and make it more pliable for rolling.
Is there a way to make chicken caesar wraps without anchovies or for vegetarians?
Absolutely! Simply omit the anchovy paste from the dressing—the other ingredients will still create a delicious caesar flavor. For extra umami depth without anchovies, increase the Worcestershire sauce to 1.5 teaspoons. For vegetarian versions, you can replace the chicken with marinated tofu, roasted chickpeas, or grilled portobello mushrooms. The dressing itself is vegetarian when you skip the anchovies.
How can I make this recipe lower in calories or carbs?
Several easy swaps reduce calories and carbs: Use a low-carb or keto tortilla instead of regular flour tortillas (saving 20-30 carbs), make the dressing with full Greek yogurt instead of mayo (adding protein and reducing fat), and skip or reduce the Parmesan shavings. You can also use large lettuce leaves as a wrap base instead of a tortilla—this creates a lettuce wrap with the same filling. These modifications can reduce calories from 380 to 250-300 per wrap while increasing the protein ratio.
Final Thoughts
The chicken caesar wrap is one of those recipes that seems almost too easy to be this good, yet somehow it checks every box: quick, satisfying, nutritious, and genuinely delicious. Whether you’re rushing between meetings, packing lunch for work, or looking for a light dinner option, these wraps deliver restaurant-quality flavor from your own kitchen. I’ve been making variations of this recipe for years, and my family still requests them weekly. There’s something about the combination of creamy homemade caesar dressing, fresh crisp lettuce, and tender chicken that never gets old.
The beauty of mastering this easy chicken wrap recipe is that once you understand the basic formula, you can adapt it endlessly. Try different vegetables with the seasons, experiment with various wrap types, or swap proteins as your mood dictates. Make the dressing in a big batch and use it all week on salads and other wraps. This is the kind of recipe that becomes a reliable staple in your rotation—something you make without thinking because you know it’ll turn out perfectly every single time. I genuinely hope you’ll give these a try and make them your own!
Ready to Try It?
Ready to transform your lunch routine? Try making this chicken caesar wrap recipe this week and tag us on social media with your creations—I’d love to see your variations! If you enjoy this recipe, don’t forget to pin it for later, share it with a friend who needs easy lunch ideas, and subscribe to AppetizingIdeas.com for more quick, satisfying recipes that taste like you spent hours in the kitchen. Your weekday self will thank you!